 40 years ago today Star Wars: A New Hope premiered, though it was simply called Star Wars back then. So today seems as good a time as any to post a geeky craft project I came up with.
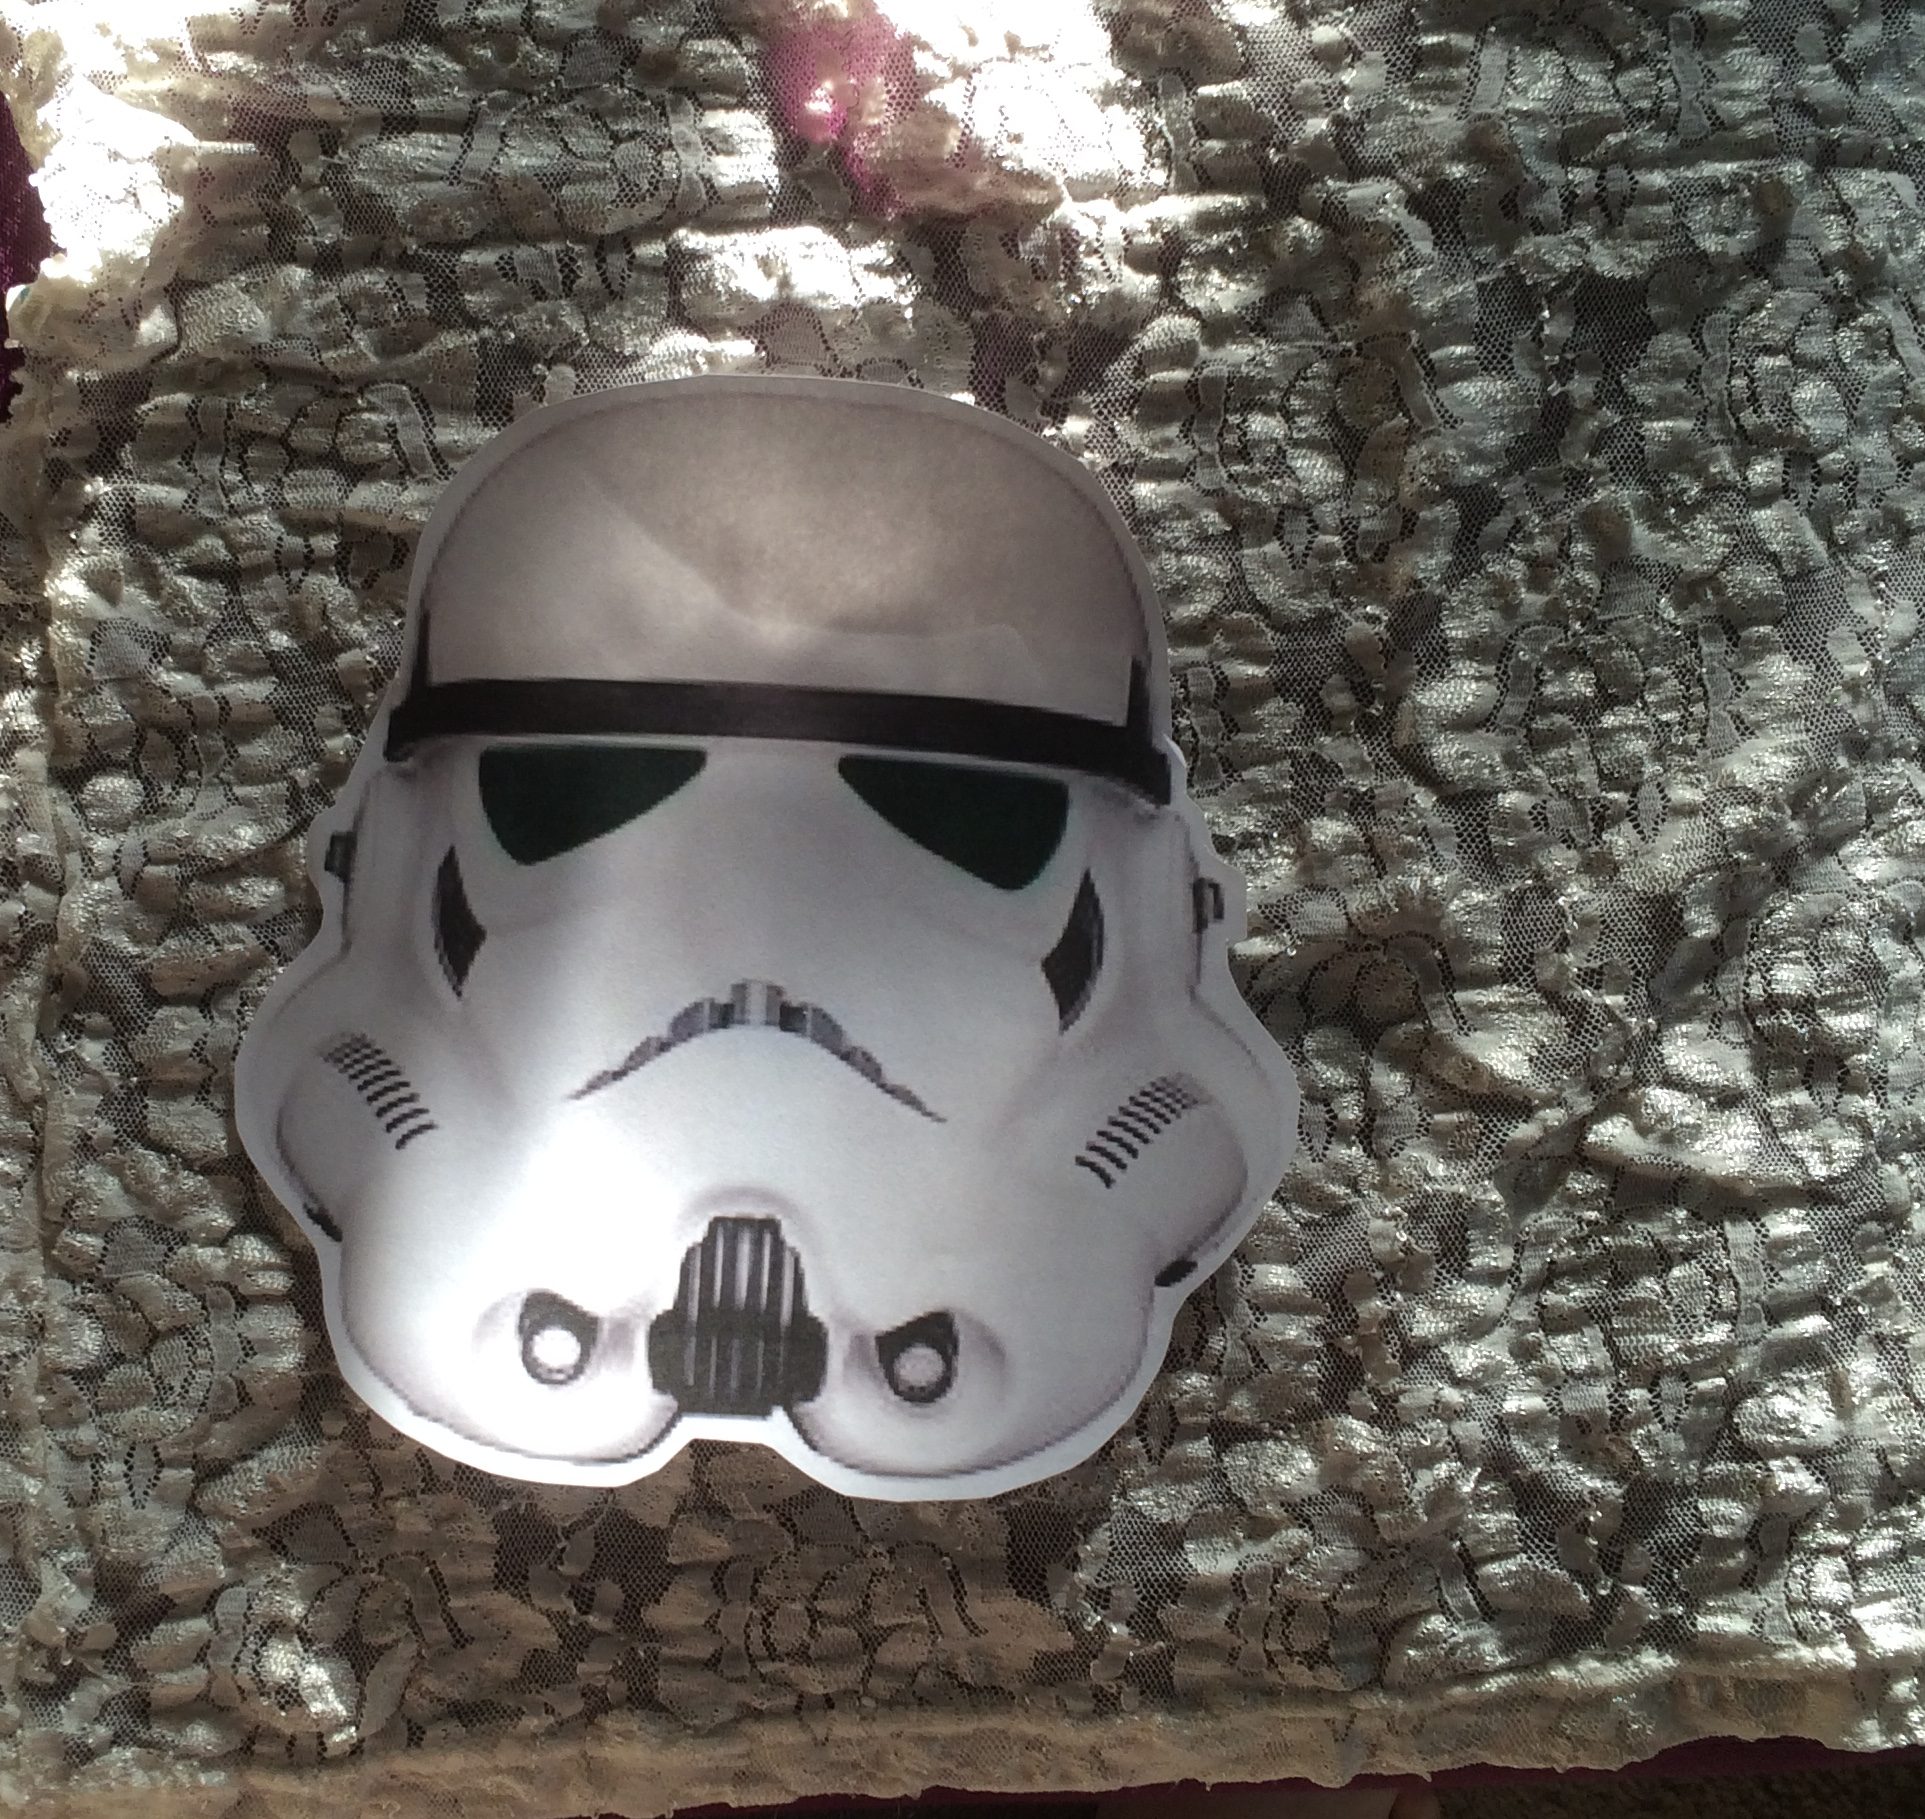
Lace Stormtroopers!
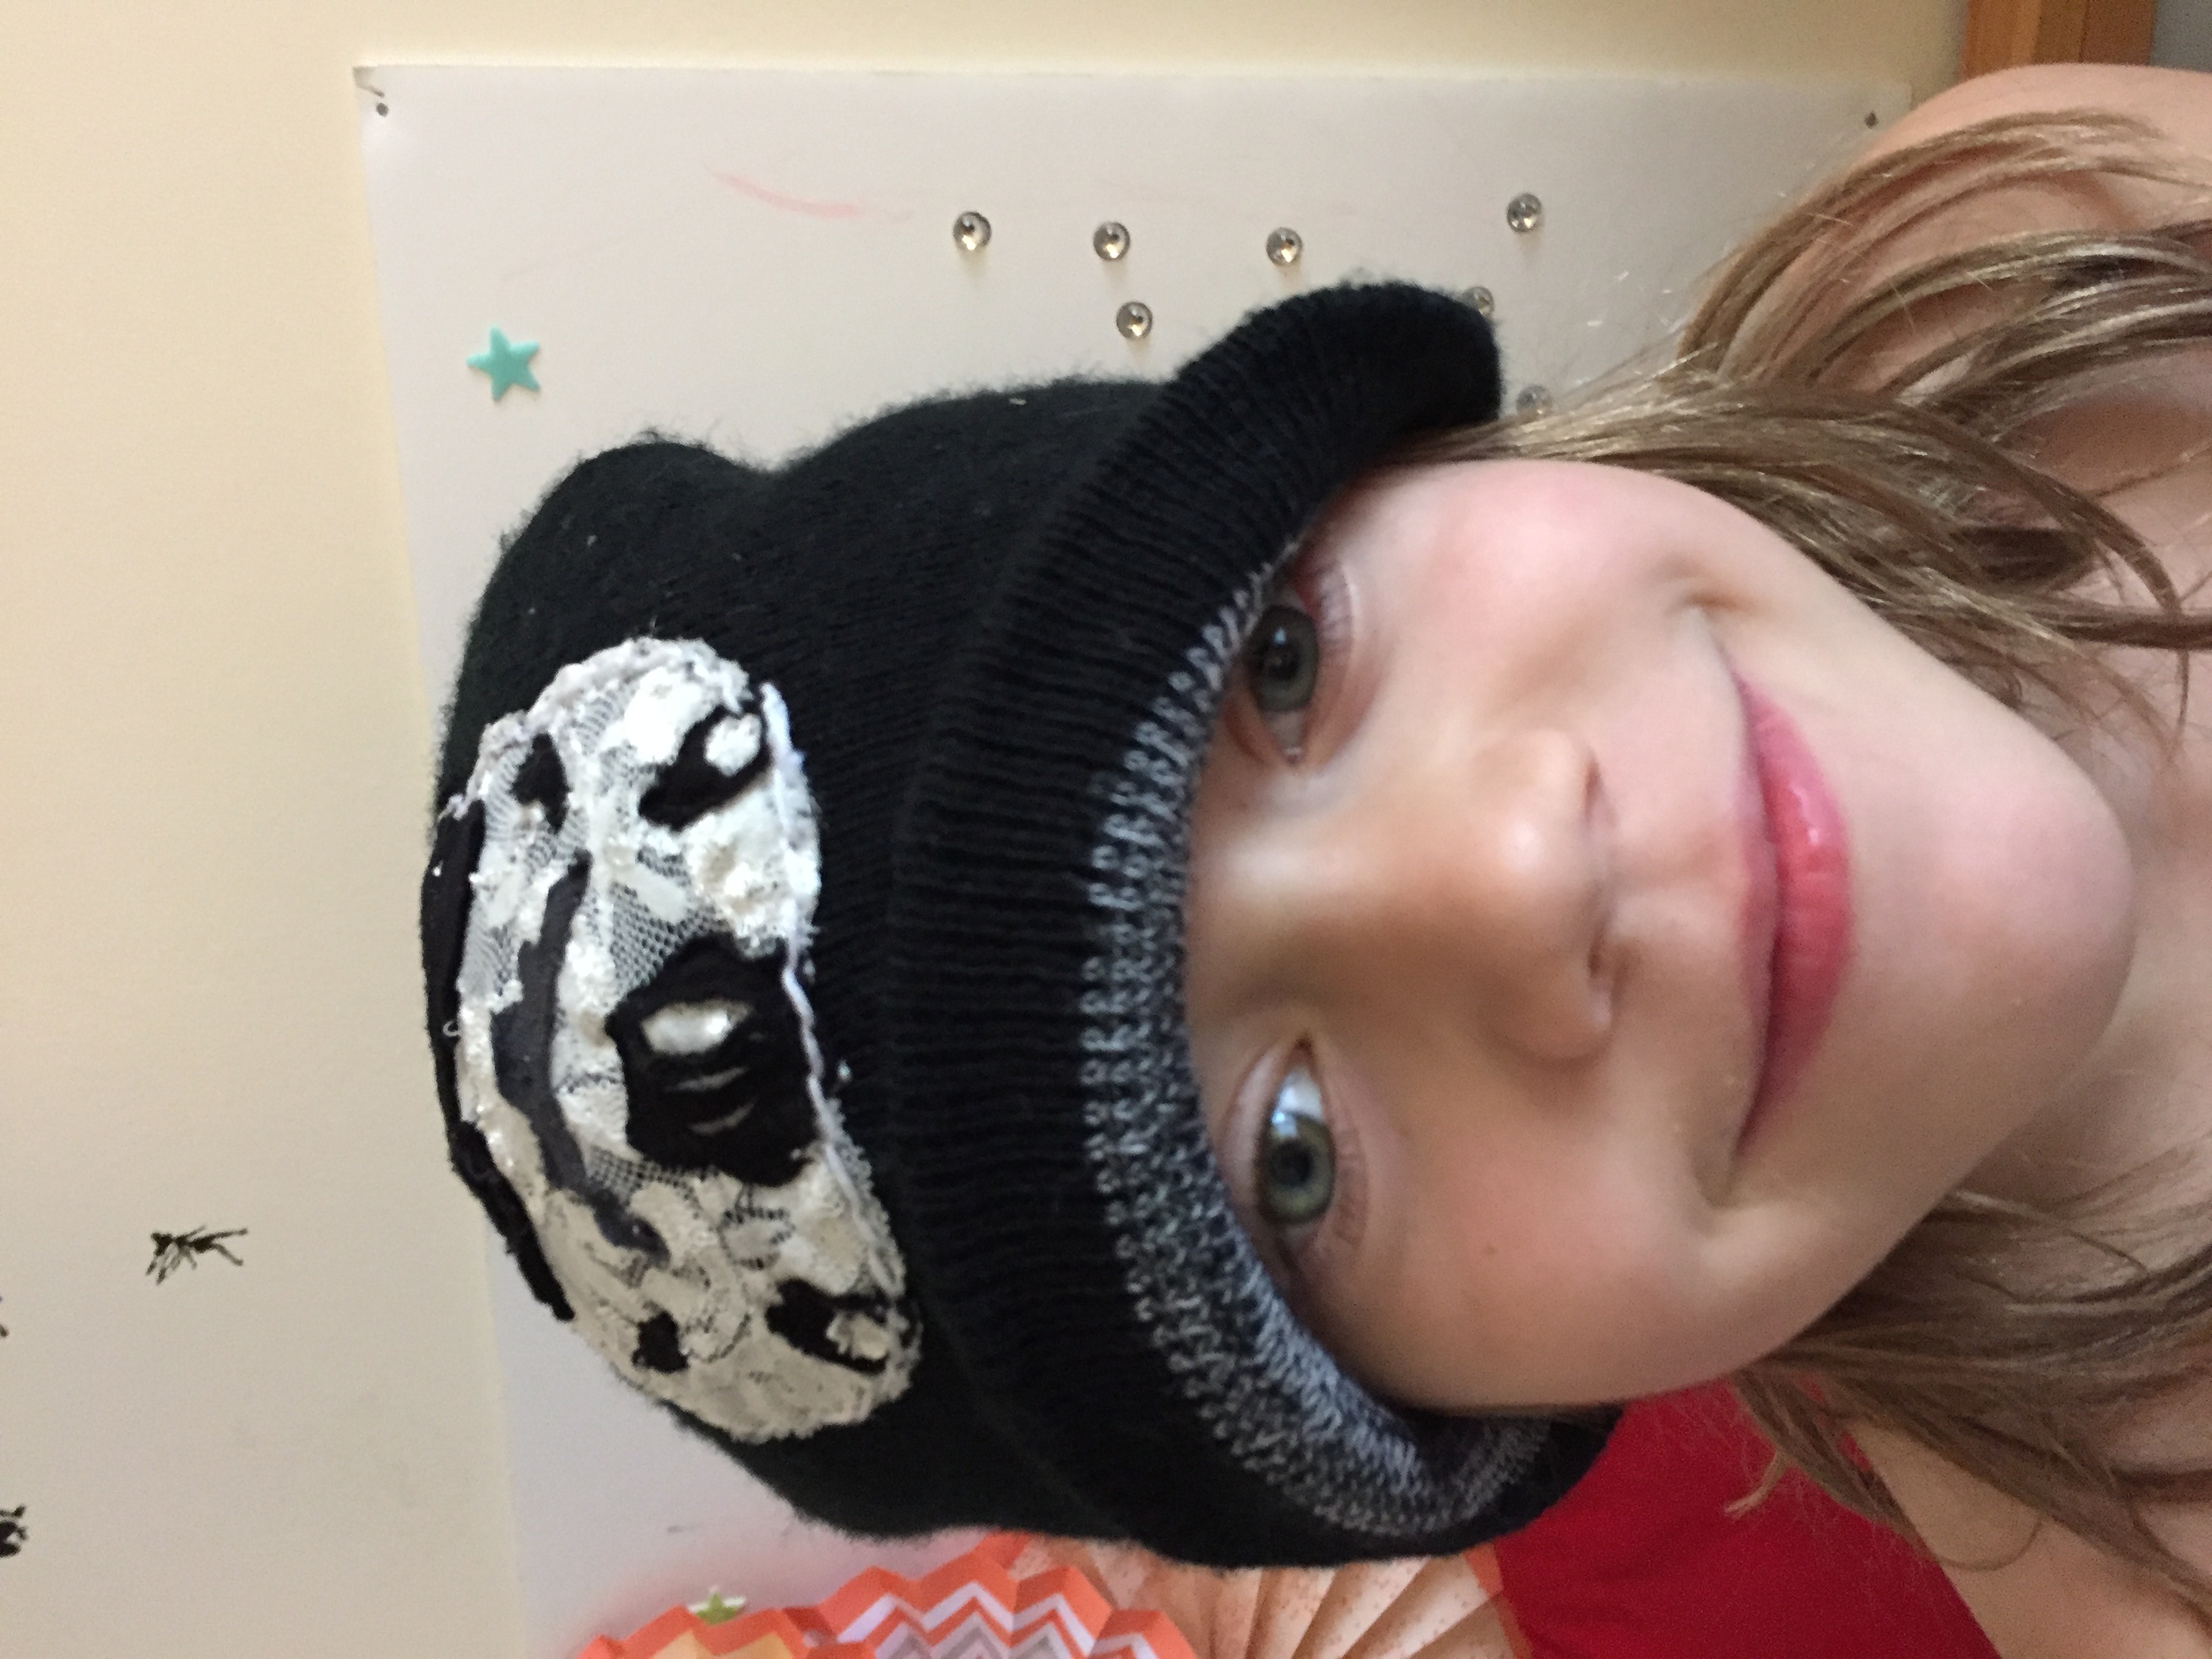
 Queue the “oohs and ahs.” Feel free also to admire my terrible selfie taking skills.
This all started when I picked up a lace tee shirt at a clothing swap with the intent of using it for crafts. The problem was I had no clue what kind of craft. But eventually the idea to make stormtrooper helmets in lace came to me and I could not get it out of my head.
Here is a step by step should anyone want to try it for themselves. Unfortunately, when I was making these, I didn’t plan on creating a how-to, so I didn’t take pictures of every step. And of the pictures I did take, some have errors. So if you do want to make a lace stormtrooper of your own I advise reading the whole post before starting.
You’ll need:
White lace (one size L shirt produced two medium sized trooper helmets and one mini, with scrap leftover. Or you can purchase the lace of your choice by the yard.) The shirt I used was stretch material, but it caused some difficulties when sewing, so I would use a nonelastic fabric next time.
Black fabric of your choice. I used an old black shirt from my scrap bag.
Black thread.
White thread.
Optional dark gray fabric for some of the helmet details. The black will work fine for this but I had dark gray fabric in my scrap bag so I used it for the nose piece.
A shirt, jacket, hat, etc. to sew it on to.
Sewing machine optional. This can all be done by hand, but I did most of it on the machine. Go with whichever method you’re most comfortable with.
A printout of a trooper helmet to use as a template.
Step 1
Cut a decent sized square of lace. Pin the template to the lace and cut the fabric into an approximation of the helmet shape.
You’ll notice that when I cut the printed helmet, I left space around the outline.
Once cut, it’ll look like this,
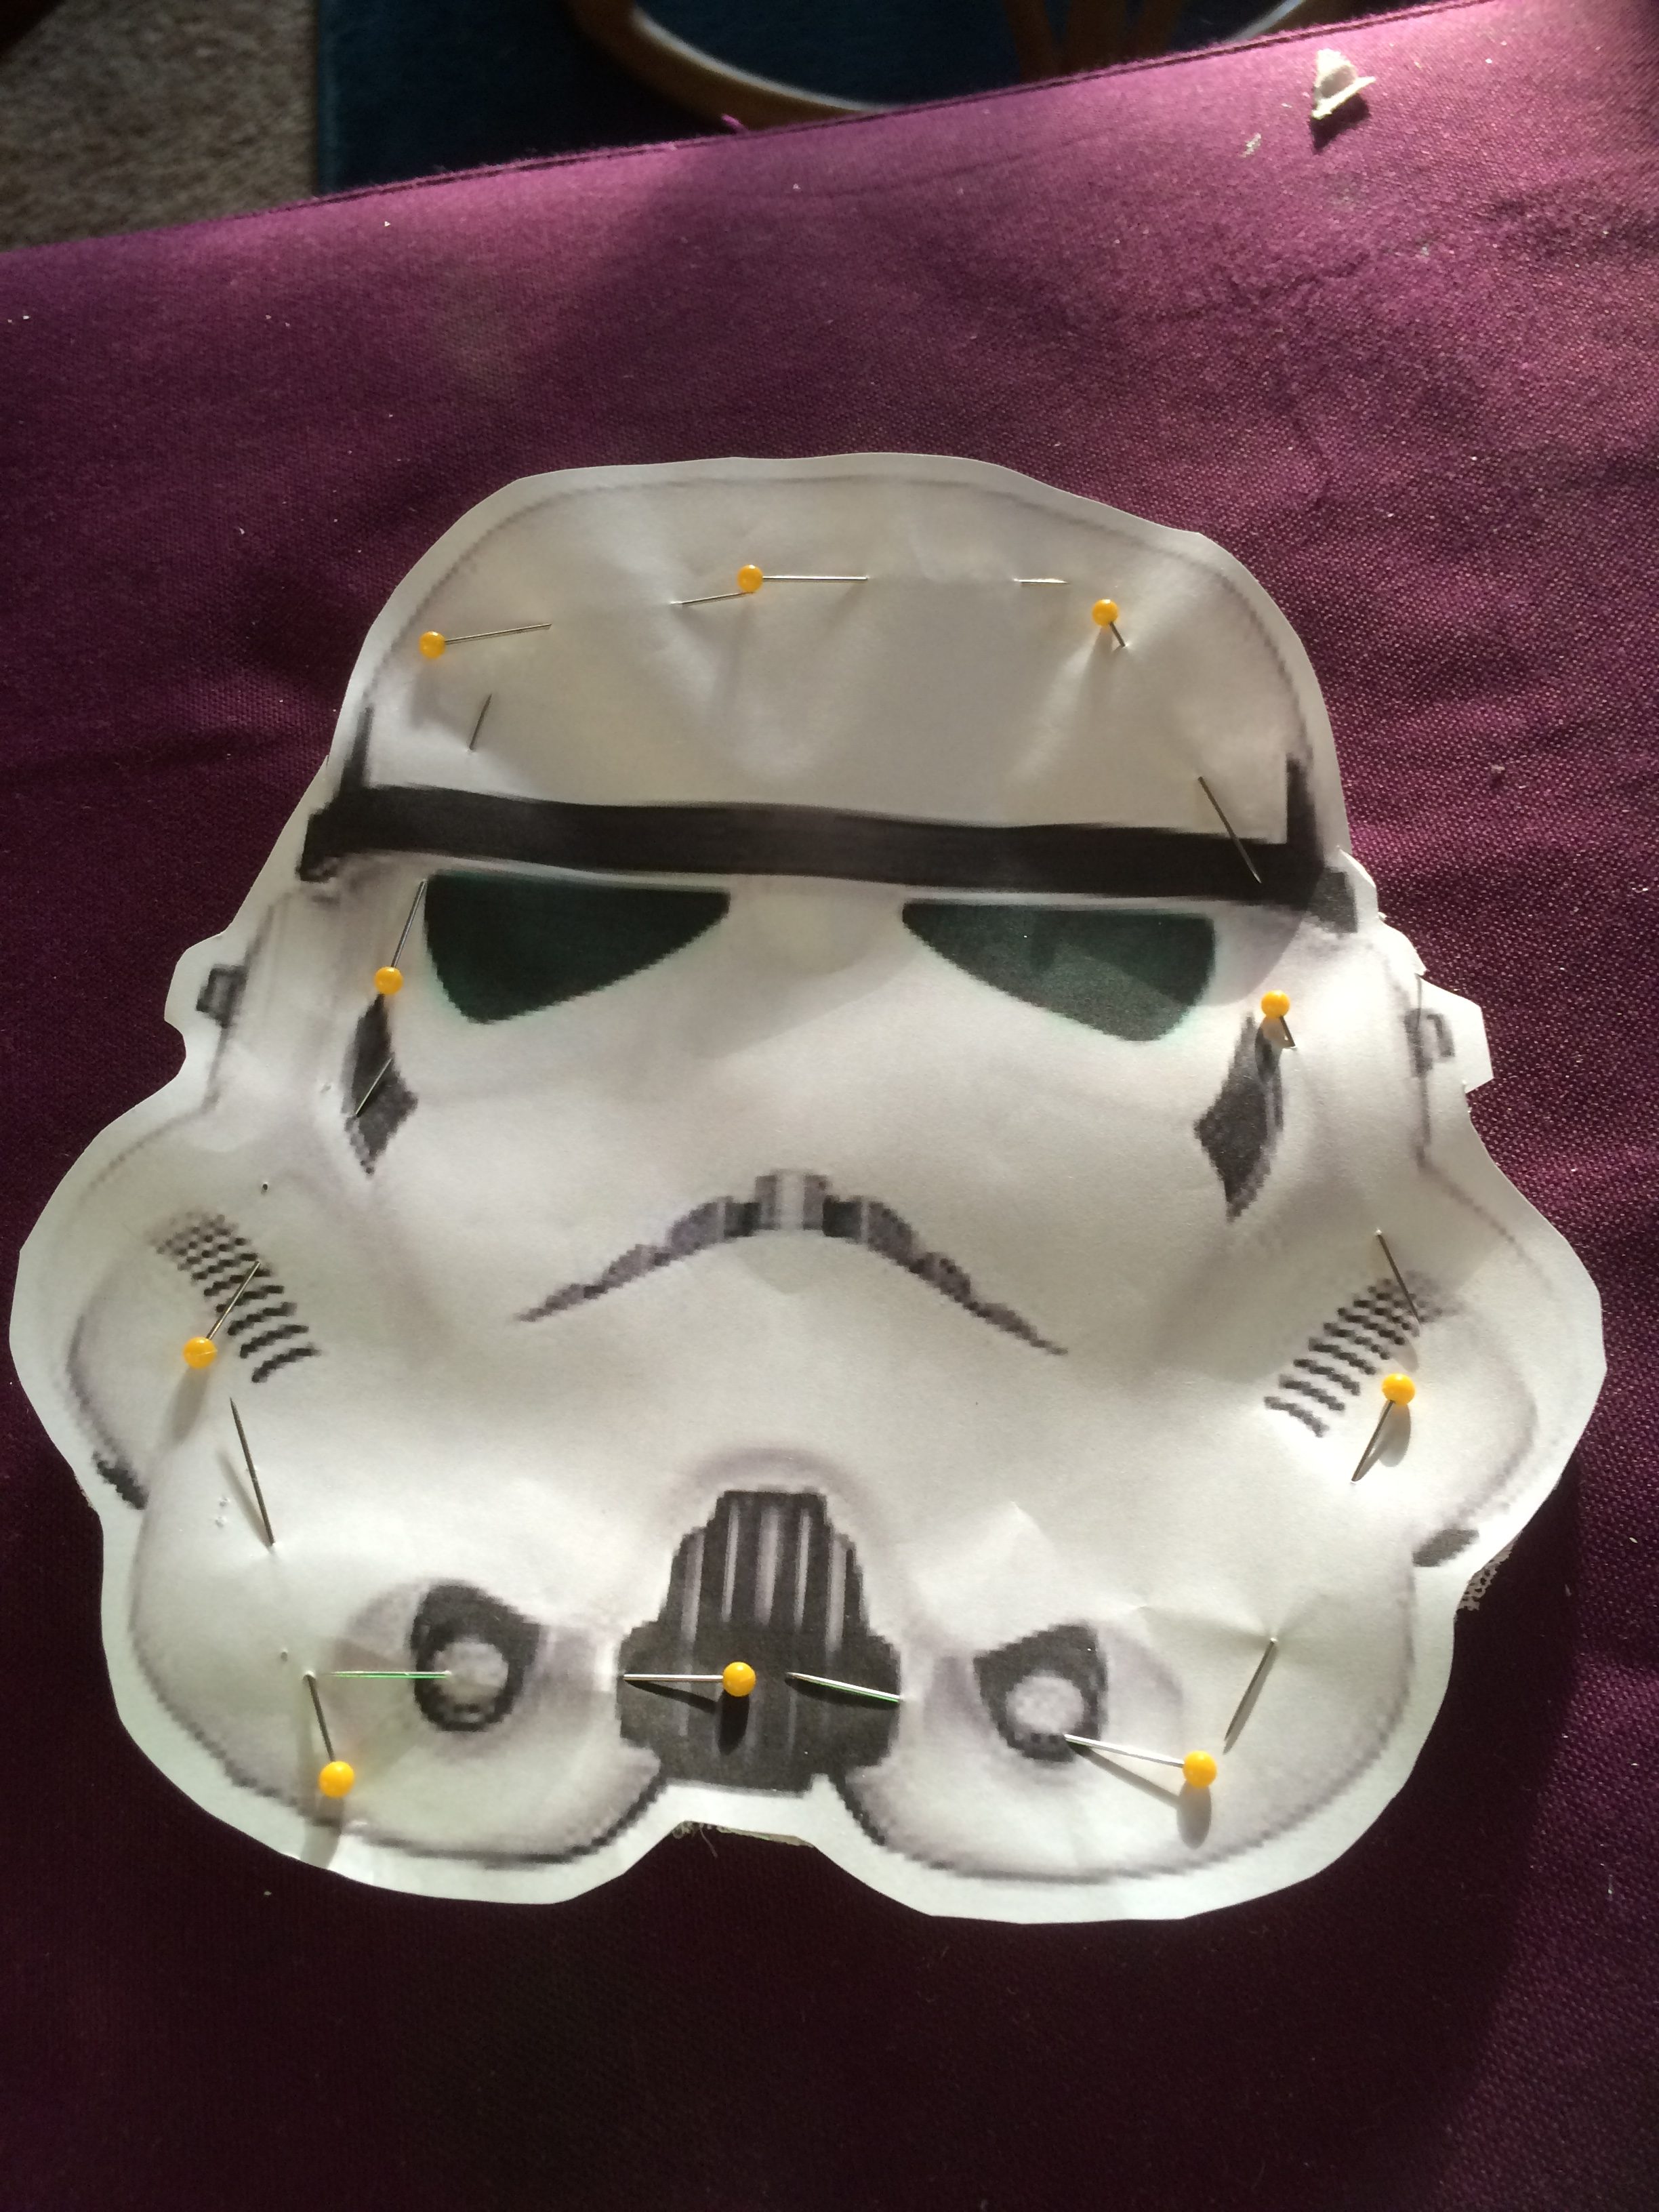
Unpin the template (but don’t throw it away) and you’ll have this,

Viola, you’re done. Enjoy your lace trooper! Kidding. This is the bottom layer of your helmet. The details get sewn onto this.
Step 2
Pin the template to another square of lace and cut out just the visor portion of the helmet. You will want to cut the paper template with the fabric this time. Cut the remaining white sections of the helmet.
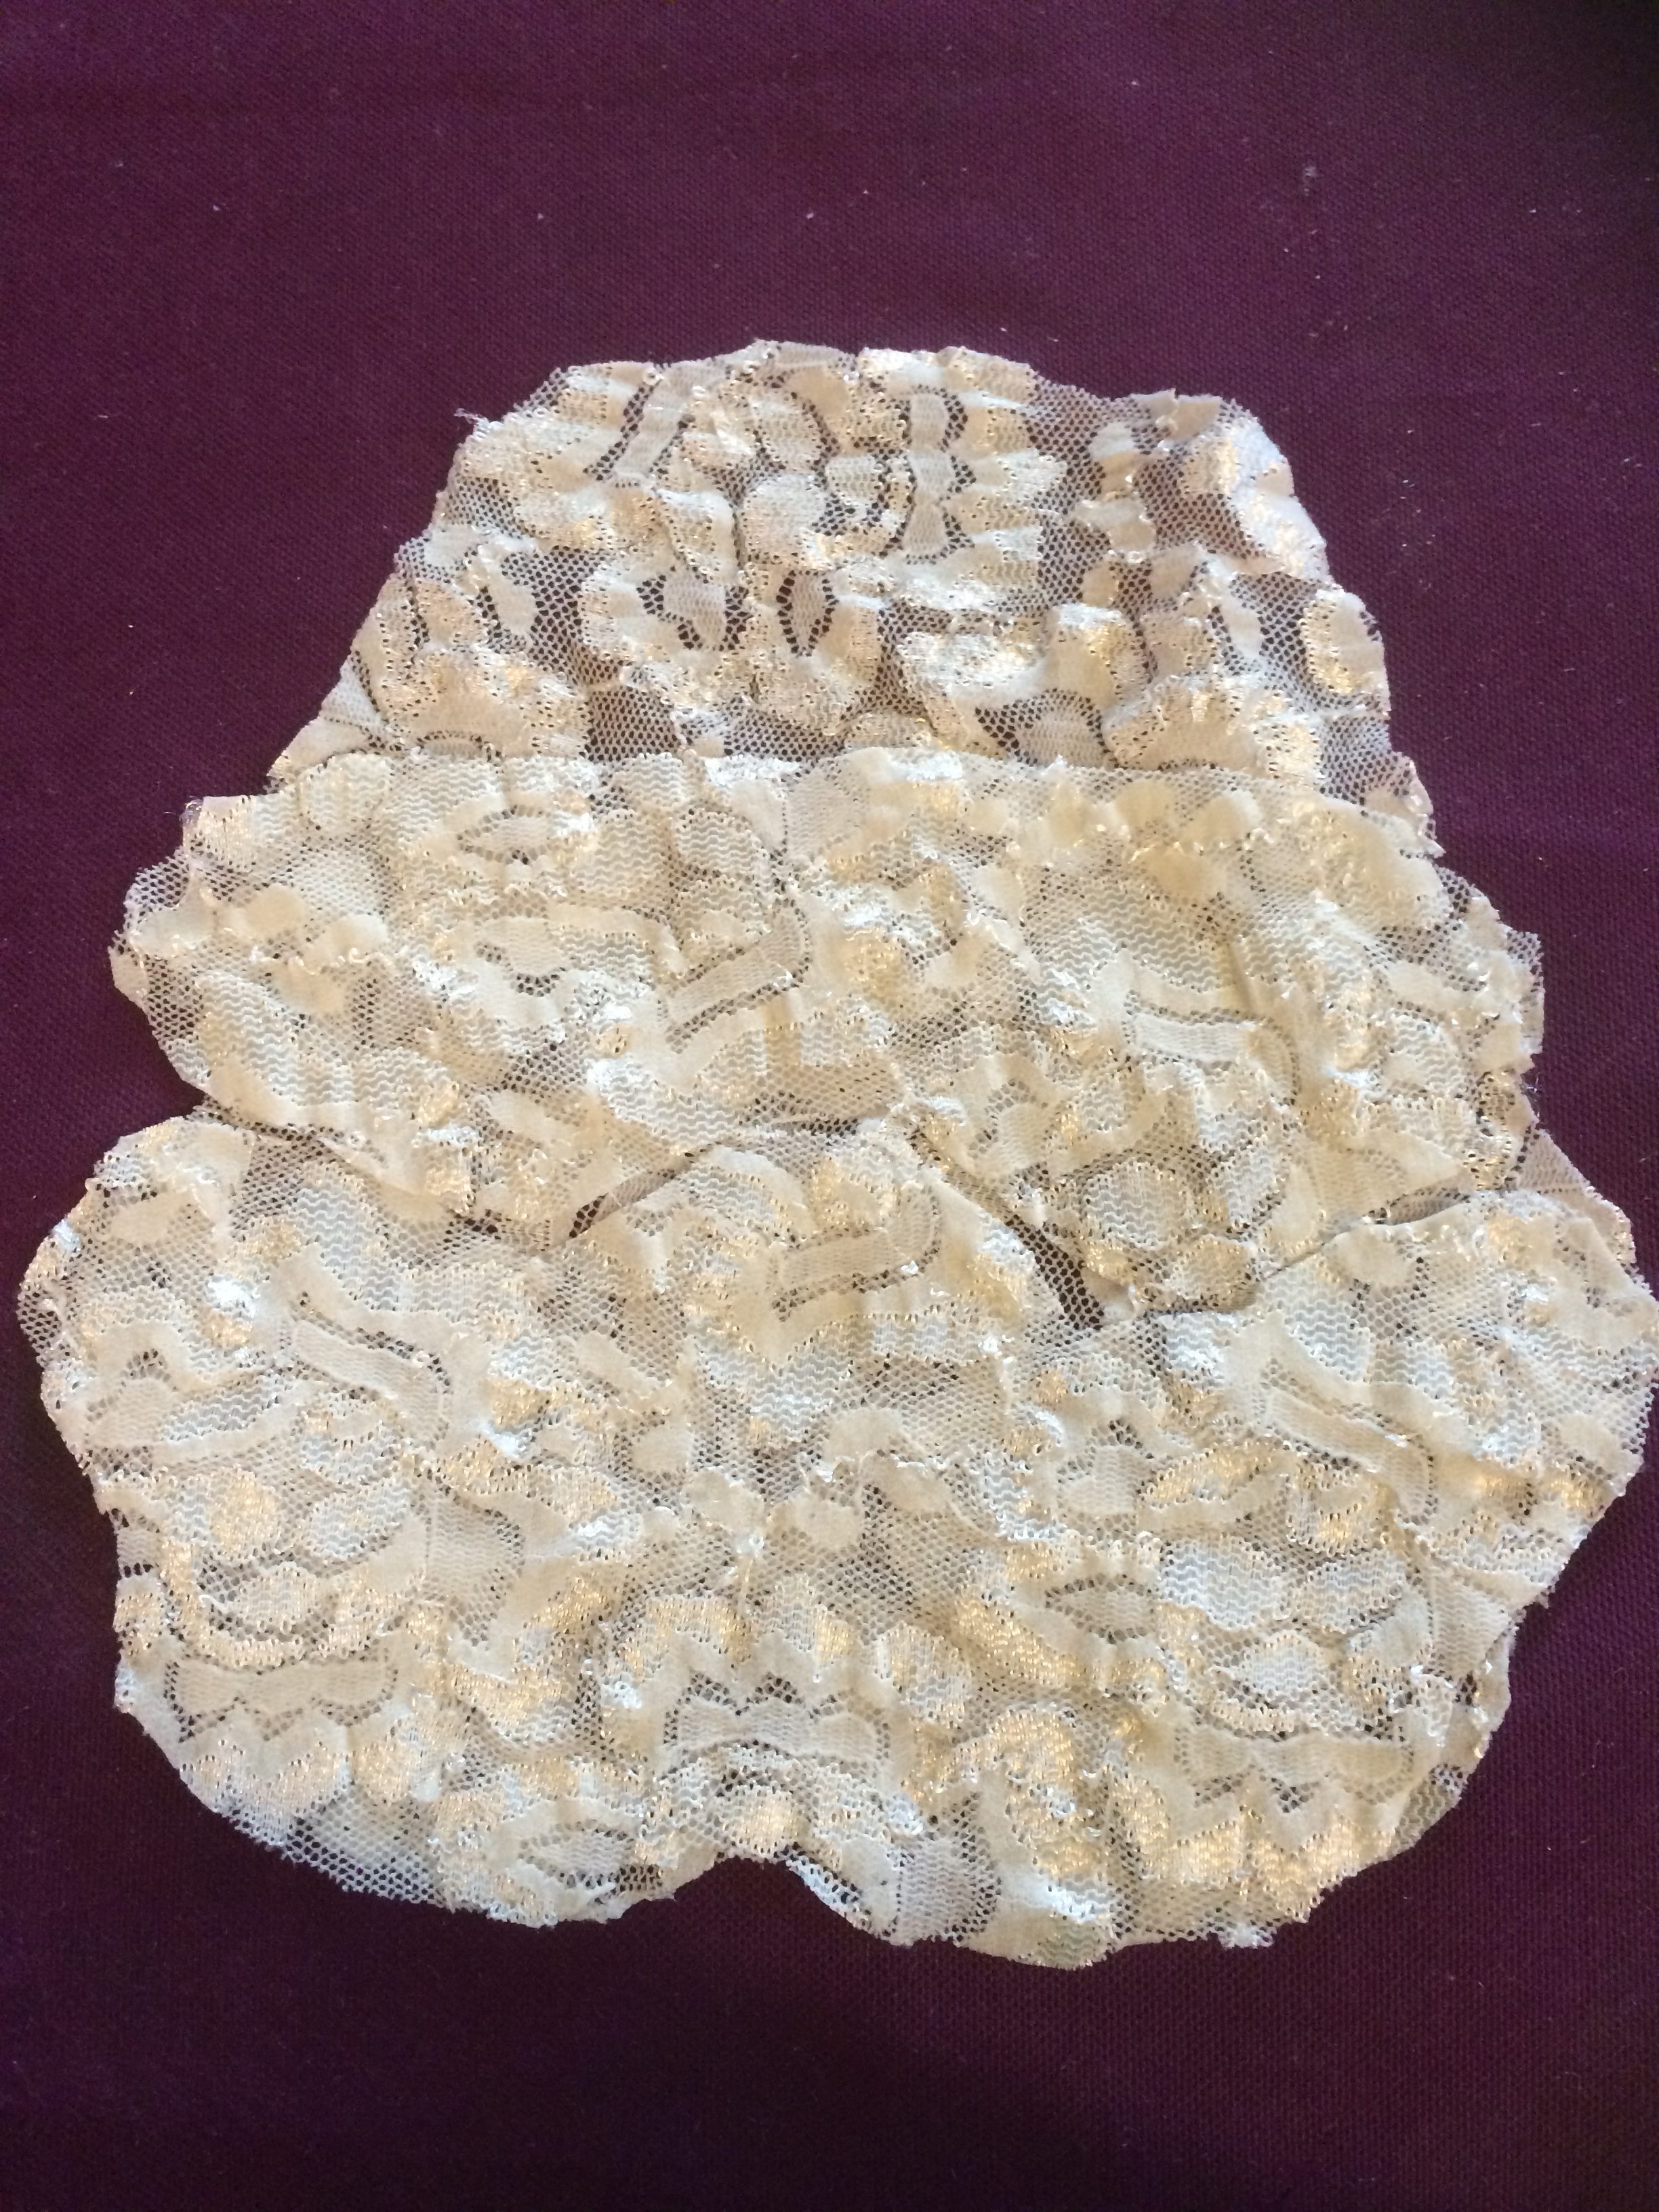
I forgot to take pictures of them laid out individually, but that is the visor piece, and the jaw and nose piece laid on top of the piece that you cut in step 1. Don’t worry if the pieces don’t fit together perfectly.
Alternately you can skip this step and sew all the detail pieces directly on the base and end up with a nice looking lace stormtrooper. I did that for the mini, but I chose this layered method for the larger ones to create an illusion of depth. And don’t we all want the illusion of depth?
Step 3
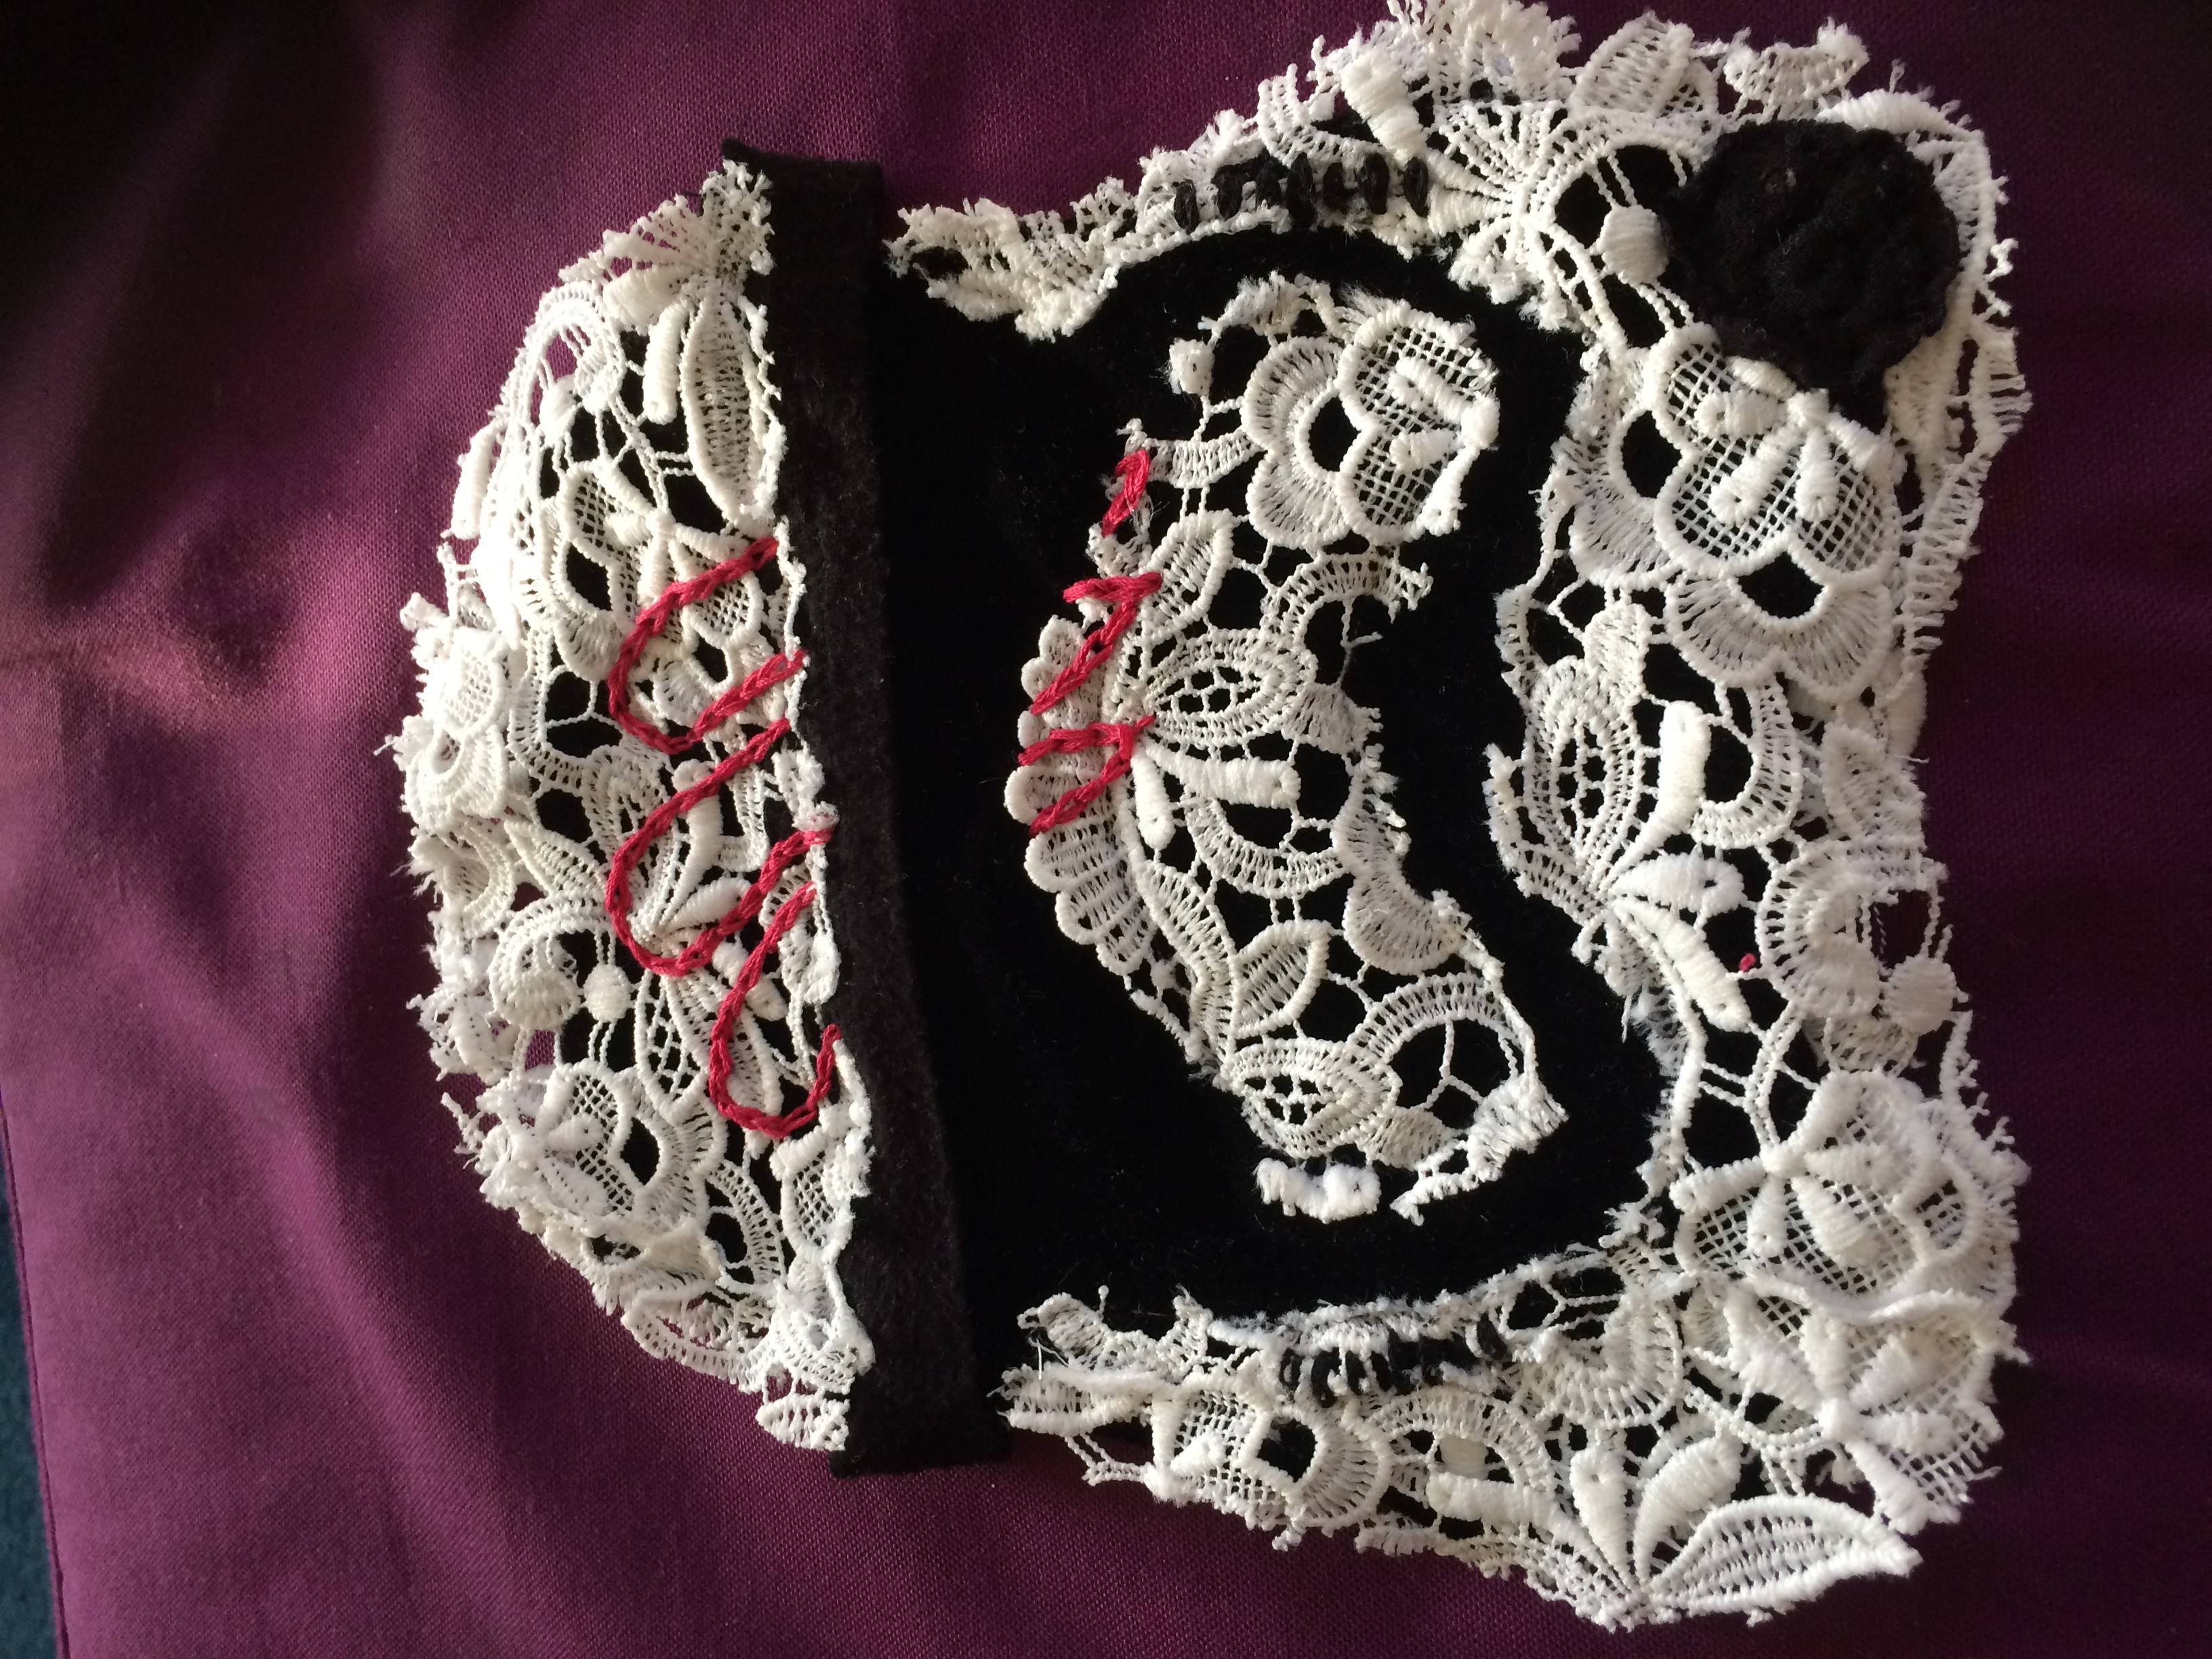
Cut out the helmet details on the black fabric. You can use the template to cut them out, but I freehanded them. If you do want to use the template for this part I recommend printing a second copy. You need two black triangles for the eye lenses. Two long thin rectangles for the side vents. One very thin strip for the top of the visor. Two half circles, with a middle point for the cheek details. Two short rectangles rounded at one end for the jaw camera-like pieces and one wacky shape (sorry, I can’t describe it any better than that) for the mouthpiece. You will also need a long V shape with ridges cut on top edge for the nose piece. That is the one piece that I used the dark gray fabric for, but you can use black for it as well.
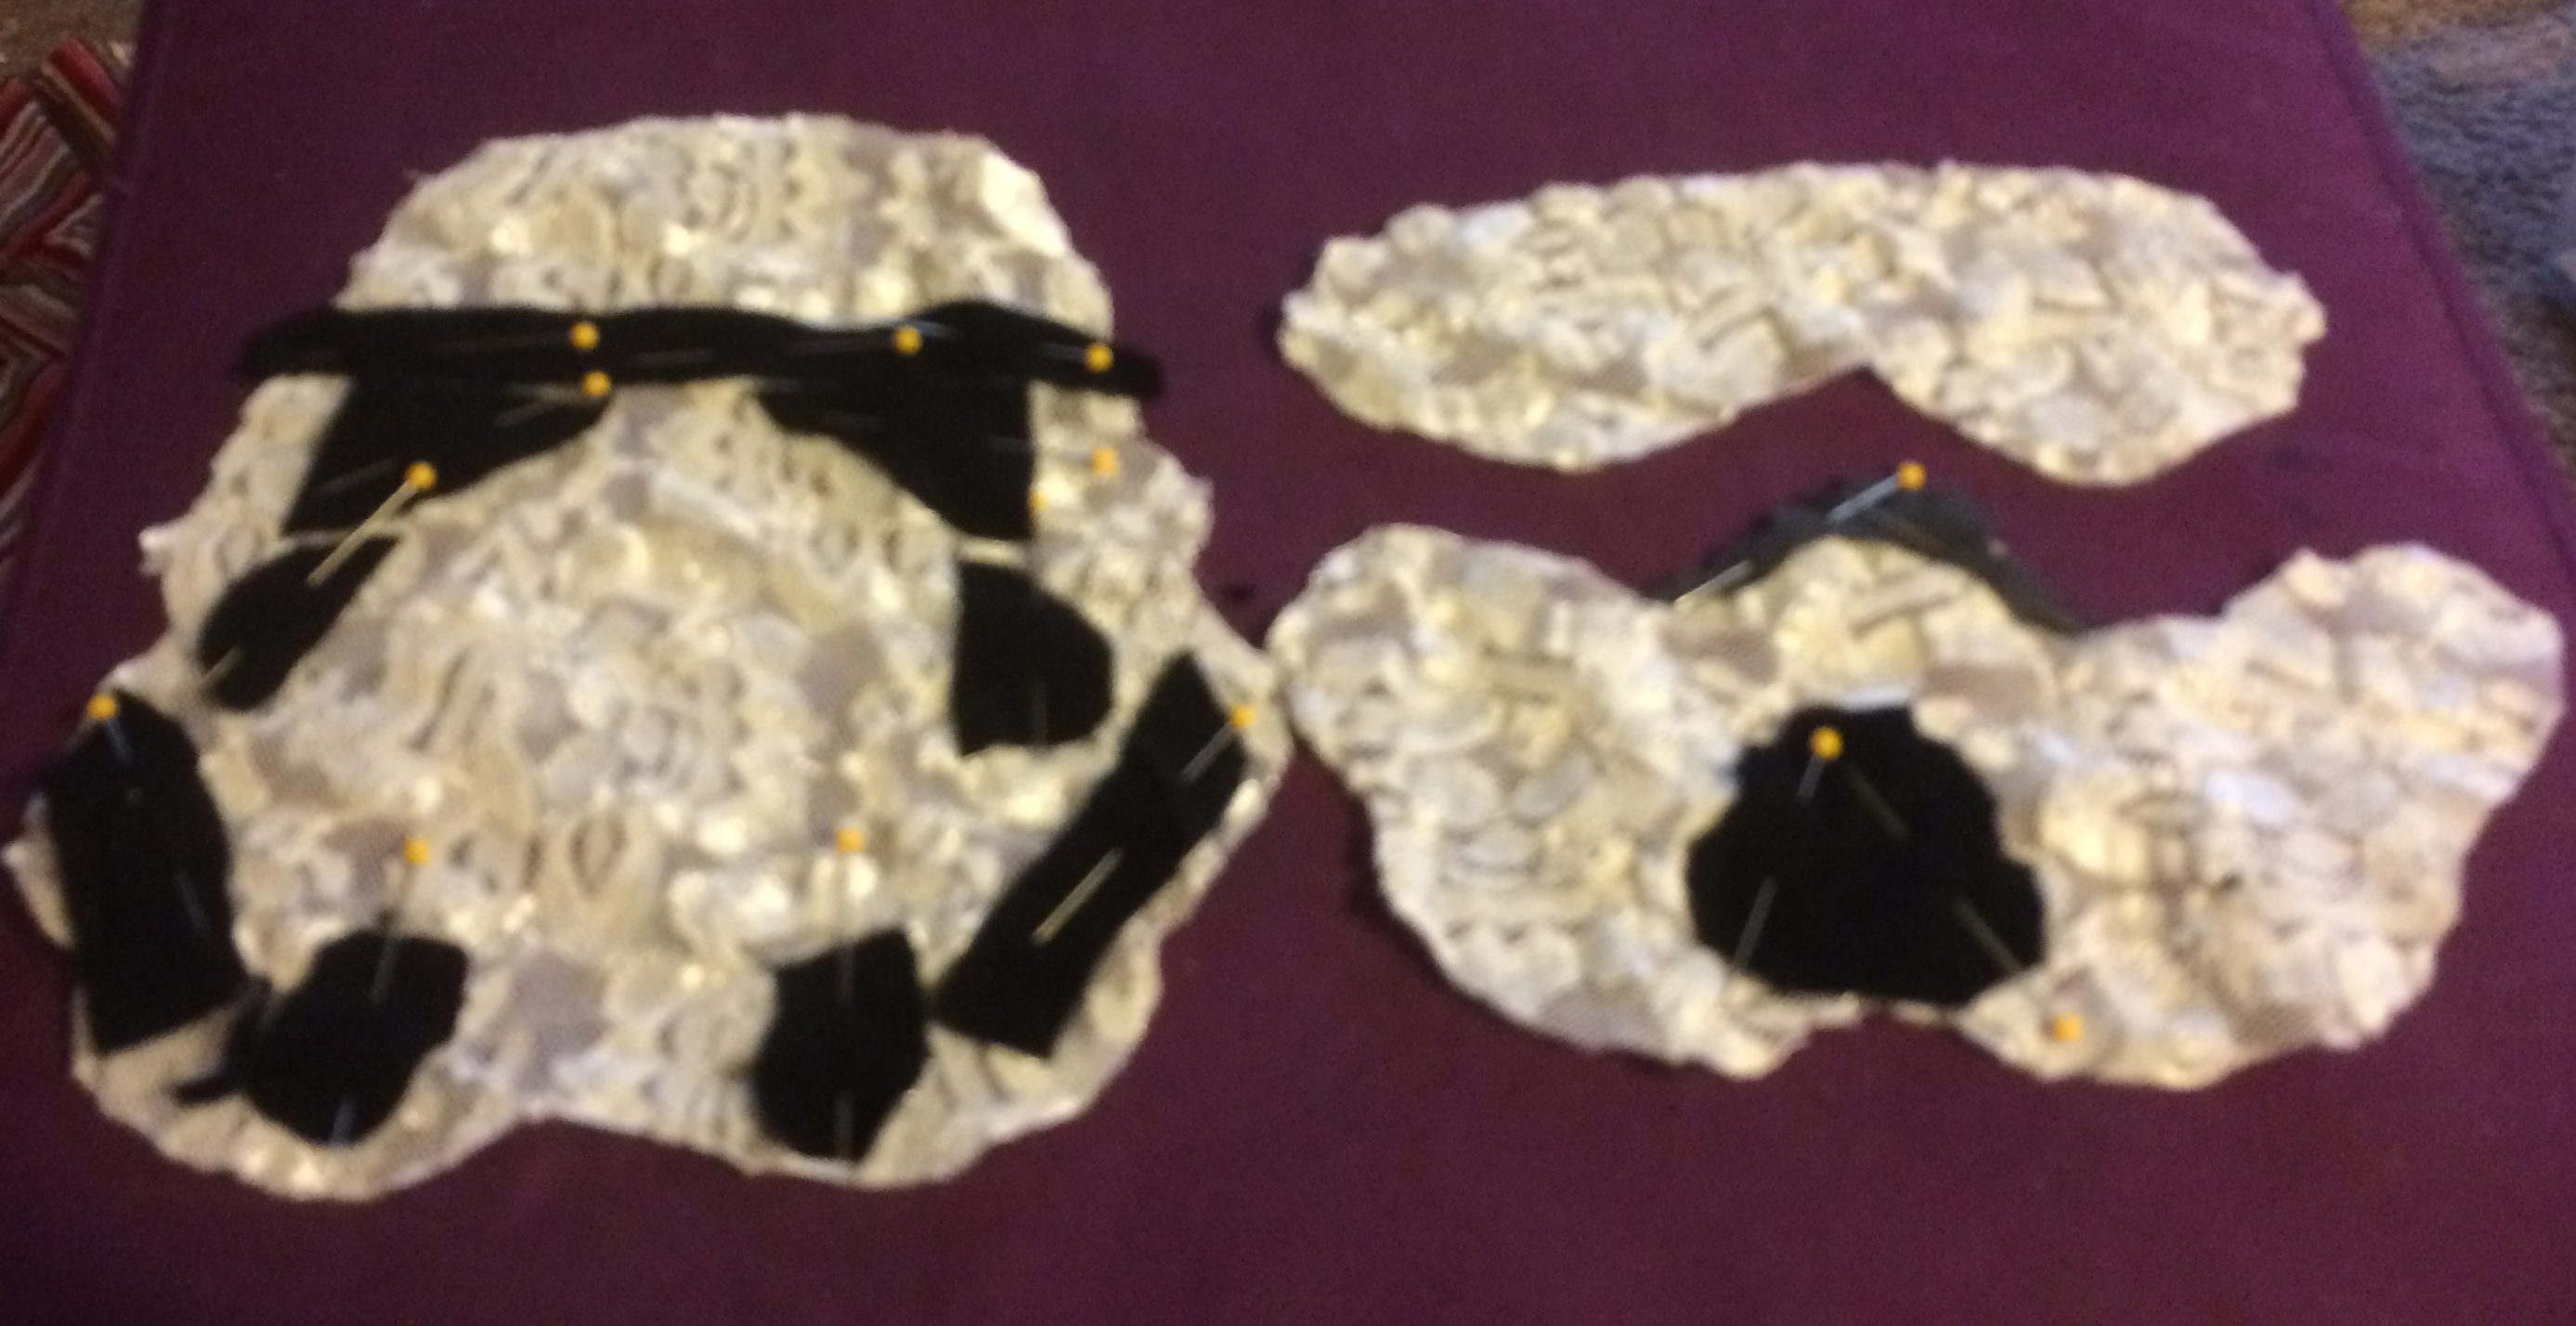
Once cut out, pin the pieces as seen above. Sew them using black thread onto the lace pieces. You should end up with three separate pieces: the base with most of the black pieces, the jaw with the nose and mouth pieces. And the visor with the two pointed half circles. (Note that in the picture I pinned them to the base piece, but that is wrong. They should be on the visor just to the side and slightly below the where the eye lenses will be.) (Other note the eye lenses are placed correctly in the photo. They do get sewn to the base).
Step 4
I didn’t really take pictures of this step, so I’ll do my best to describe it. You’ll be adding more detail to the sewn on details here.
On the mouth piece, to create the vent effect, cut several lines lengthwise, being sure not to start the cut below the top of the piece and ending just before the bottom of the piece. You want the shape to remain intact. (It may be easier to cut the lines before you sew it to jaw piece, but I didn’t. It’s your call.) Cut two rounded triangles in the visor for the lens pieces. You do want to pay attention to your template or reference photo for these. You can play fast and loose with the other details, but if the eye lenses are off it won’t look like a stormtrooper.
Cut out ten or so slits on each side of the jaw piece over where the long black rectangles are sewn to the base. I made my slits too thin, so they can hardly be seen, You can make them a little thicker. Or you can skip this altogether because it’s a minute detail. (If you do skip this part then you can leave out the long rectangles from step 3.
Cut out spaces on the jaw piece where the two jaw camera pieces are on the base.
Step 5
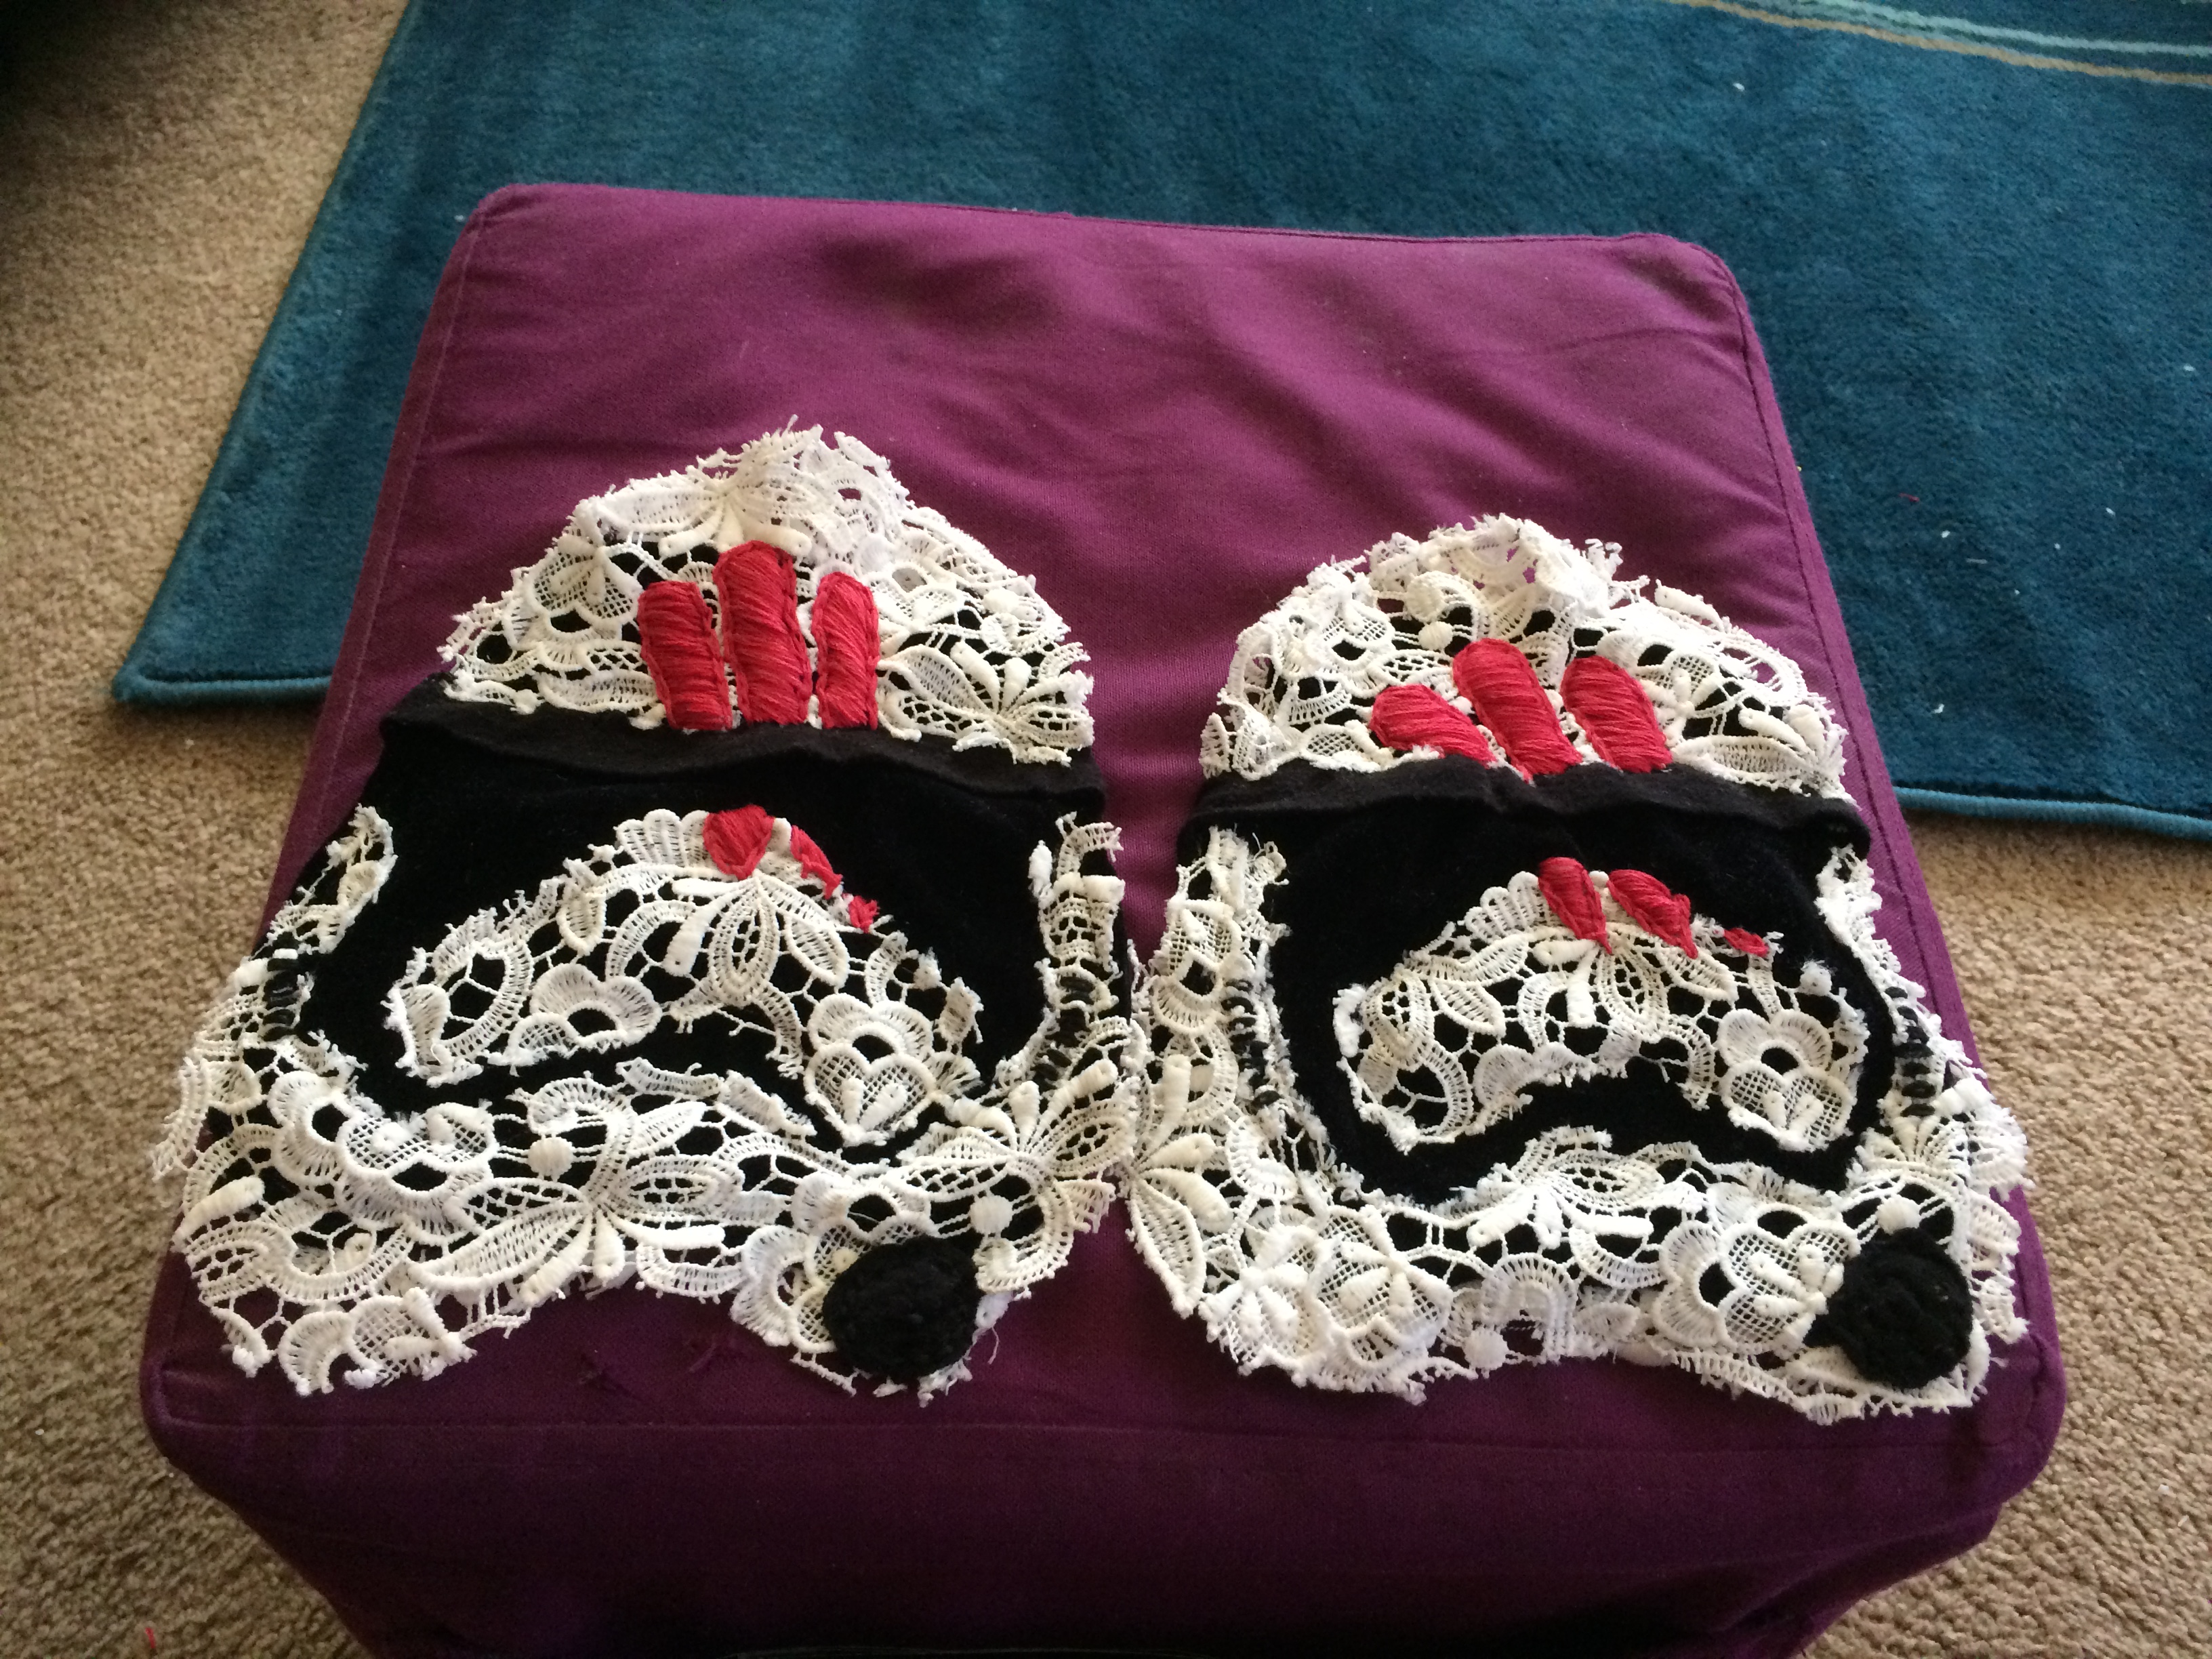
Time to sew the three separate pieces into one almost completed helmet.
Pin together and sew with white thread.
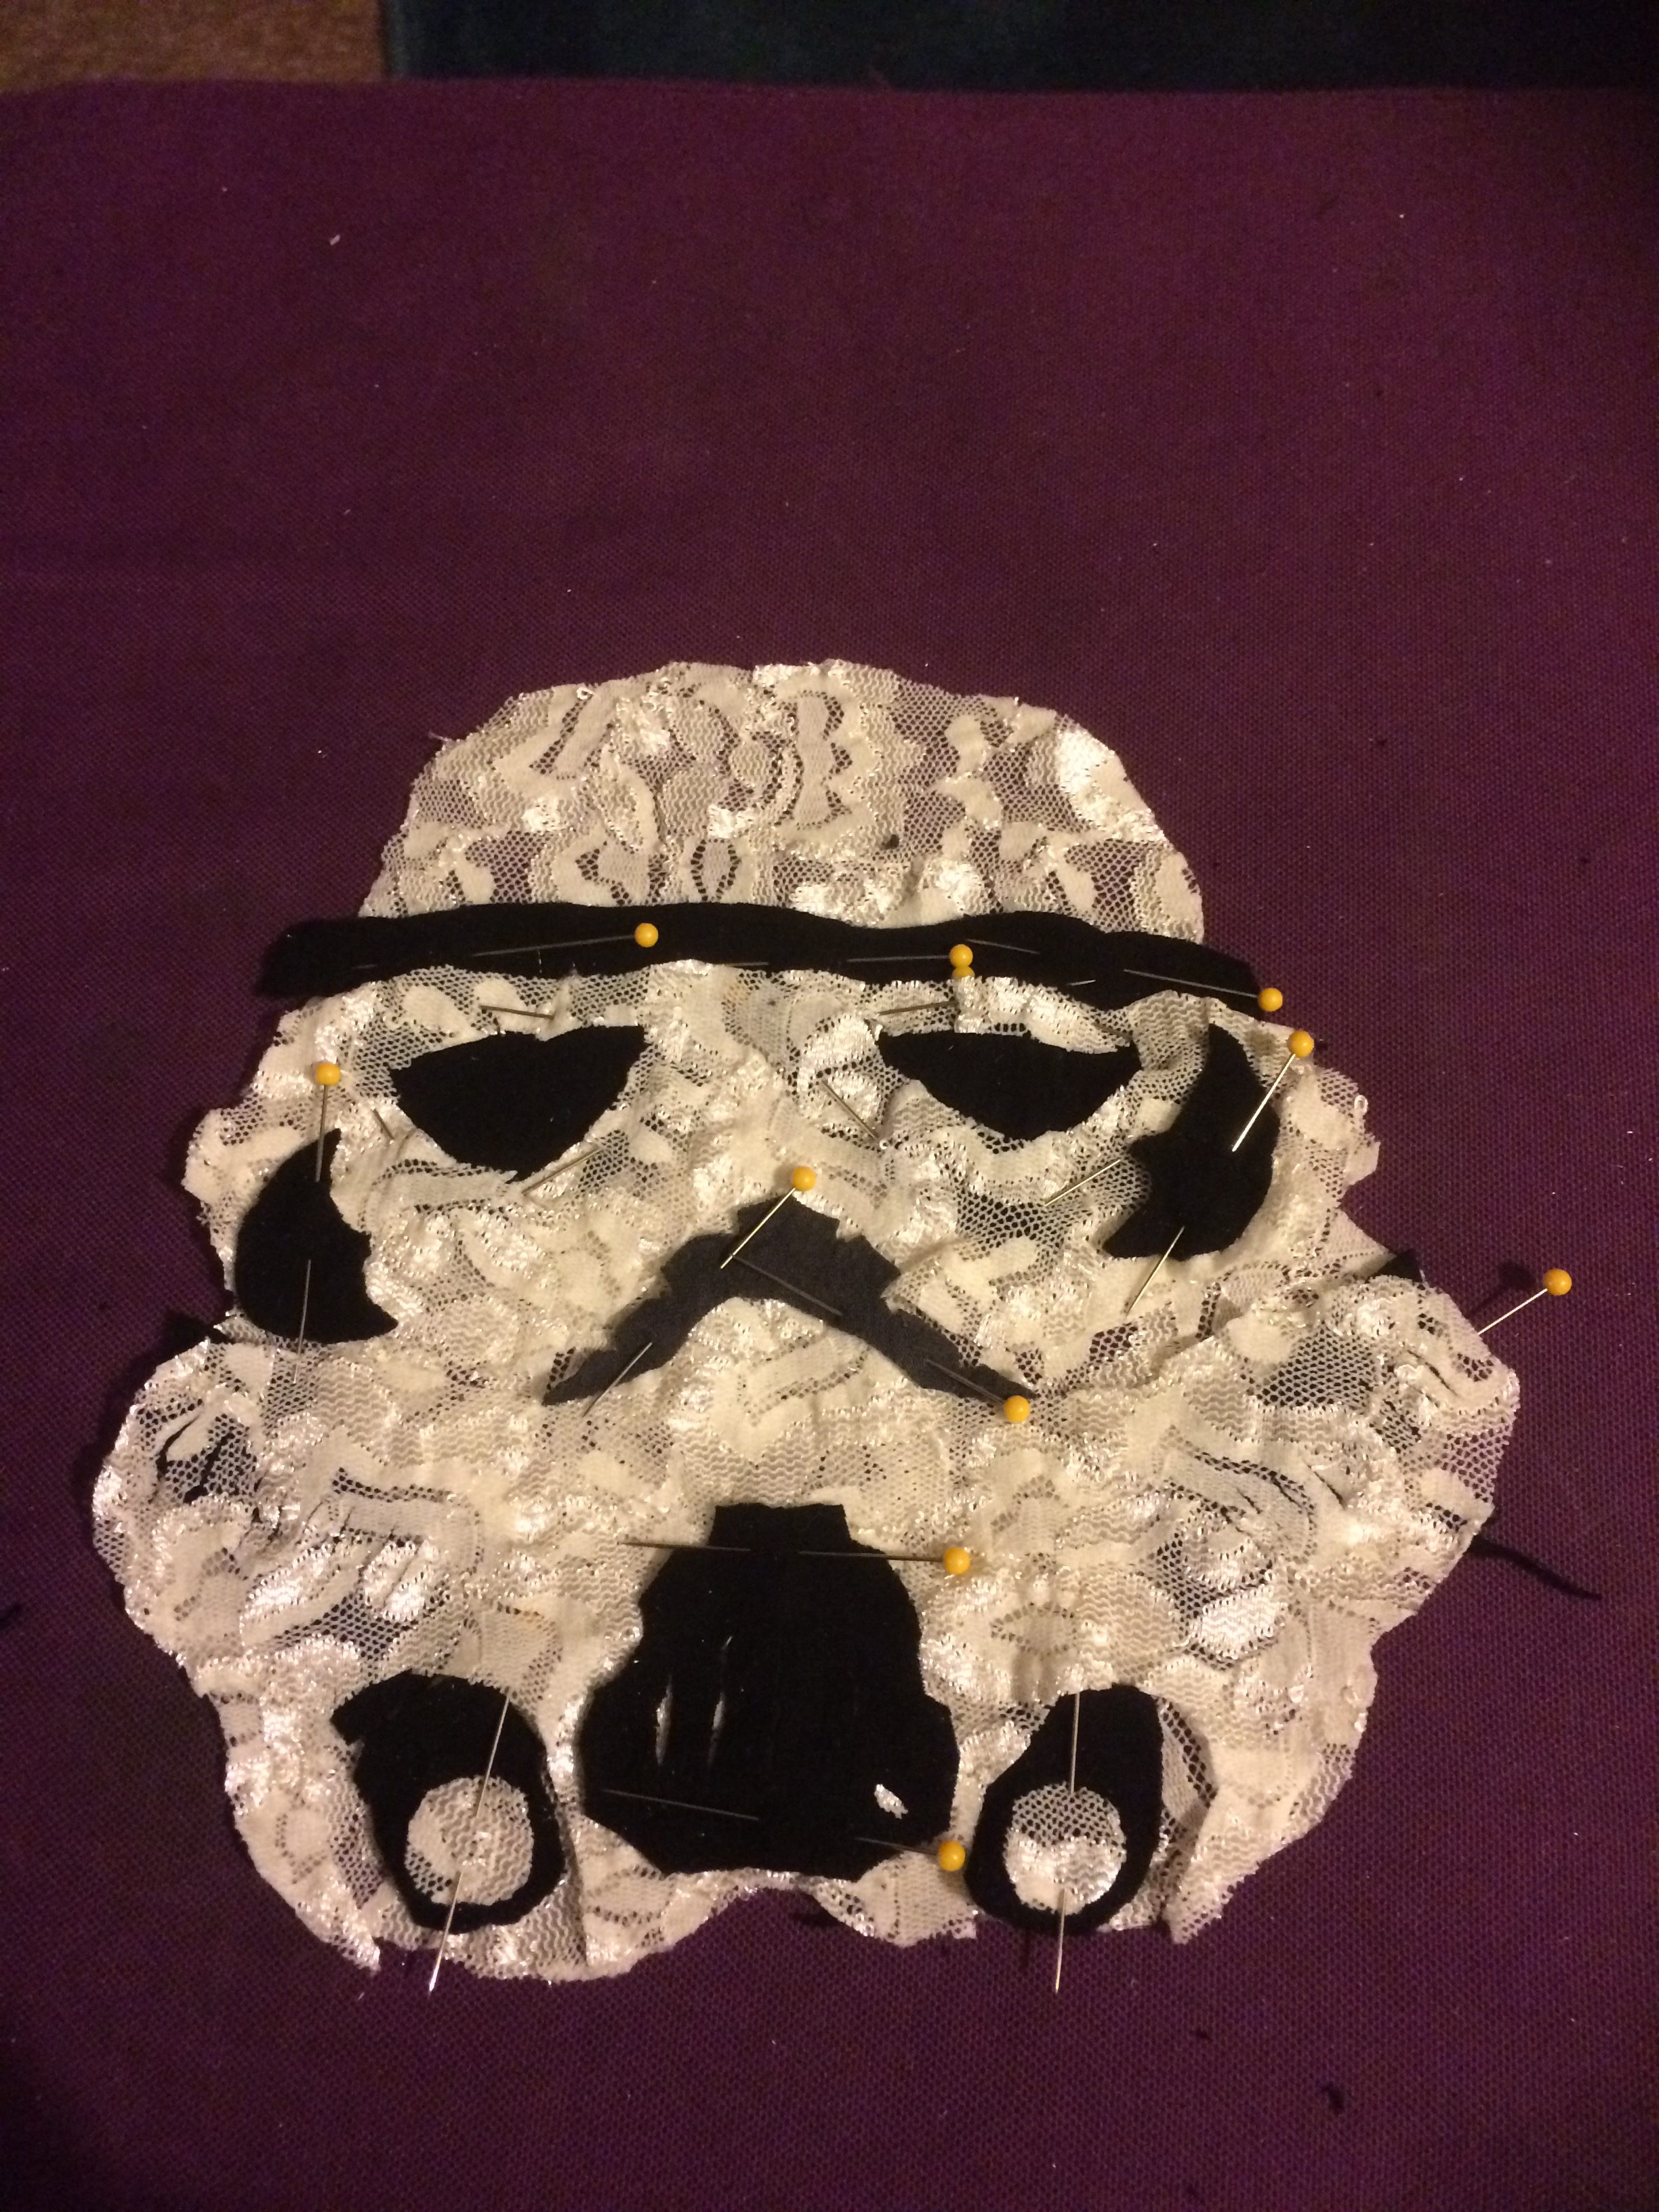
The above picture has all the pieces in the correct spots but was taken before I had sewn the details to the separate pieces. Don’t try to sew the whole piece together before you’ve done step 3. It’ll end in tears.
I don’t have a picture of this step.
Step 5.5
Cut two little circle of white lace and sew them to the jaw cameras, for jaw camera lenses, as seen in the step 5 picture. (I sewed these by hand because my sewing machine could not deal with such small stretchy pieces.) Now your helmet is complete.
Step 6
Sew your helmet onto the item of your choice. I chose a tee shirt. This is where the stretchy fabric really caused problems for me. It tended to bunch and warp as I sewed and I had to start over a few times before I was satisfied. And even then it ended up a little crooked.


And there you go!
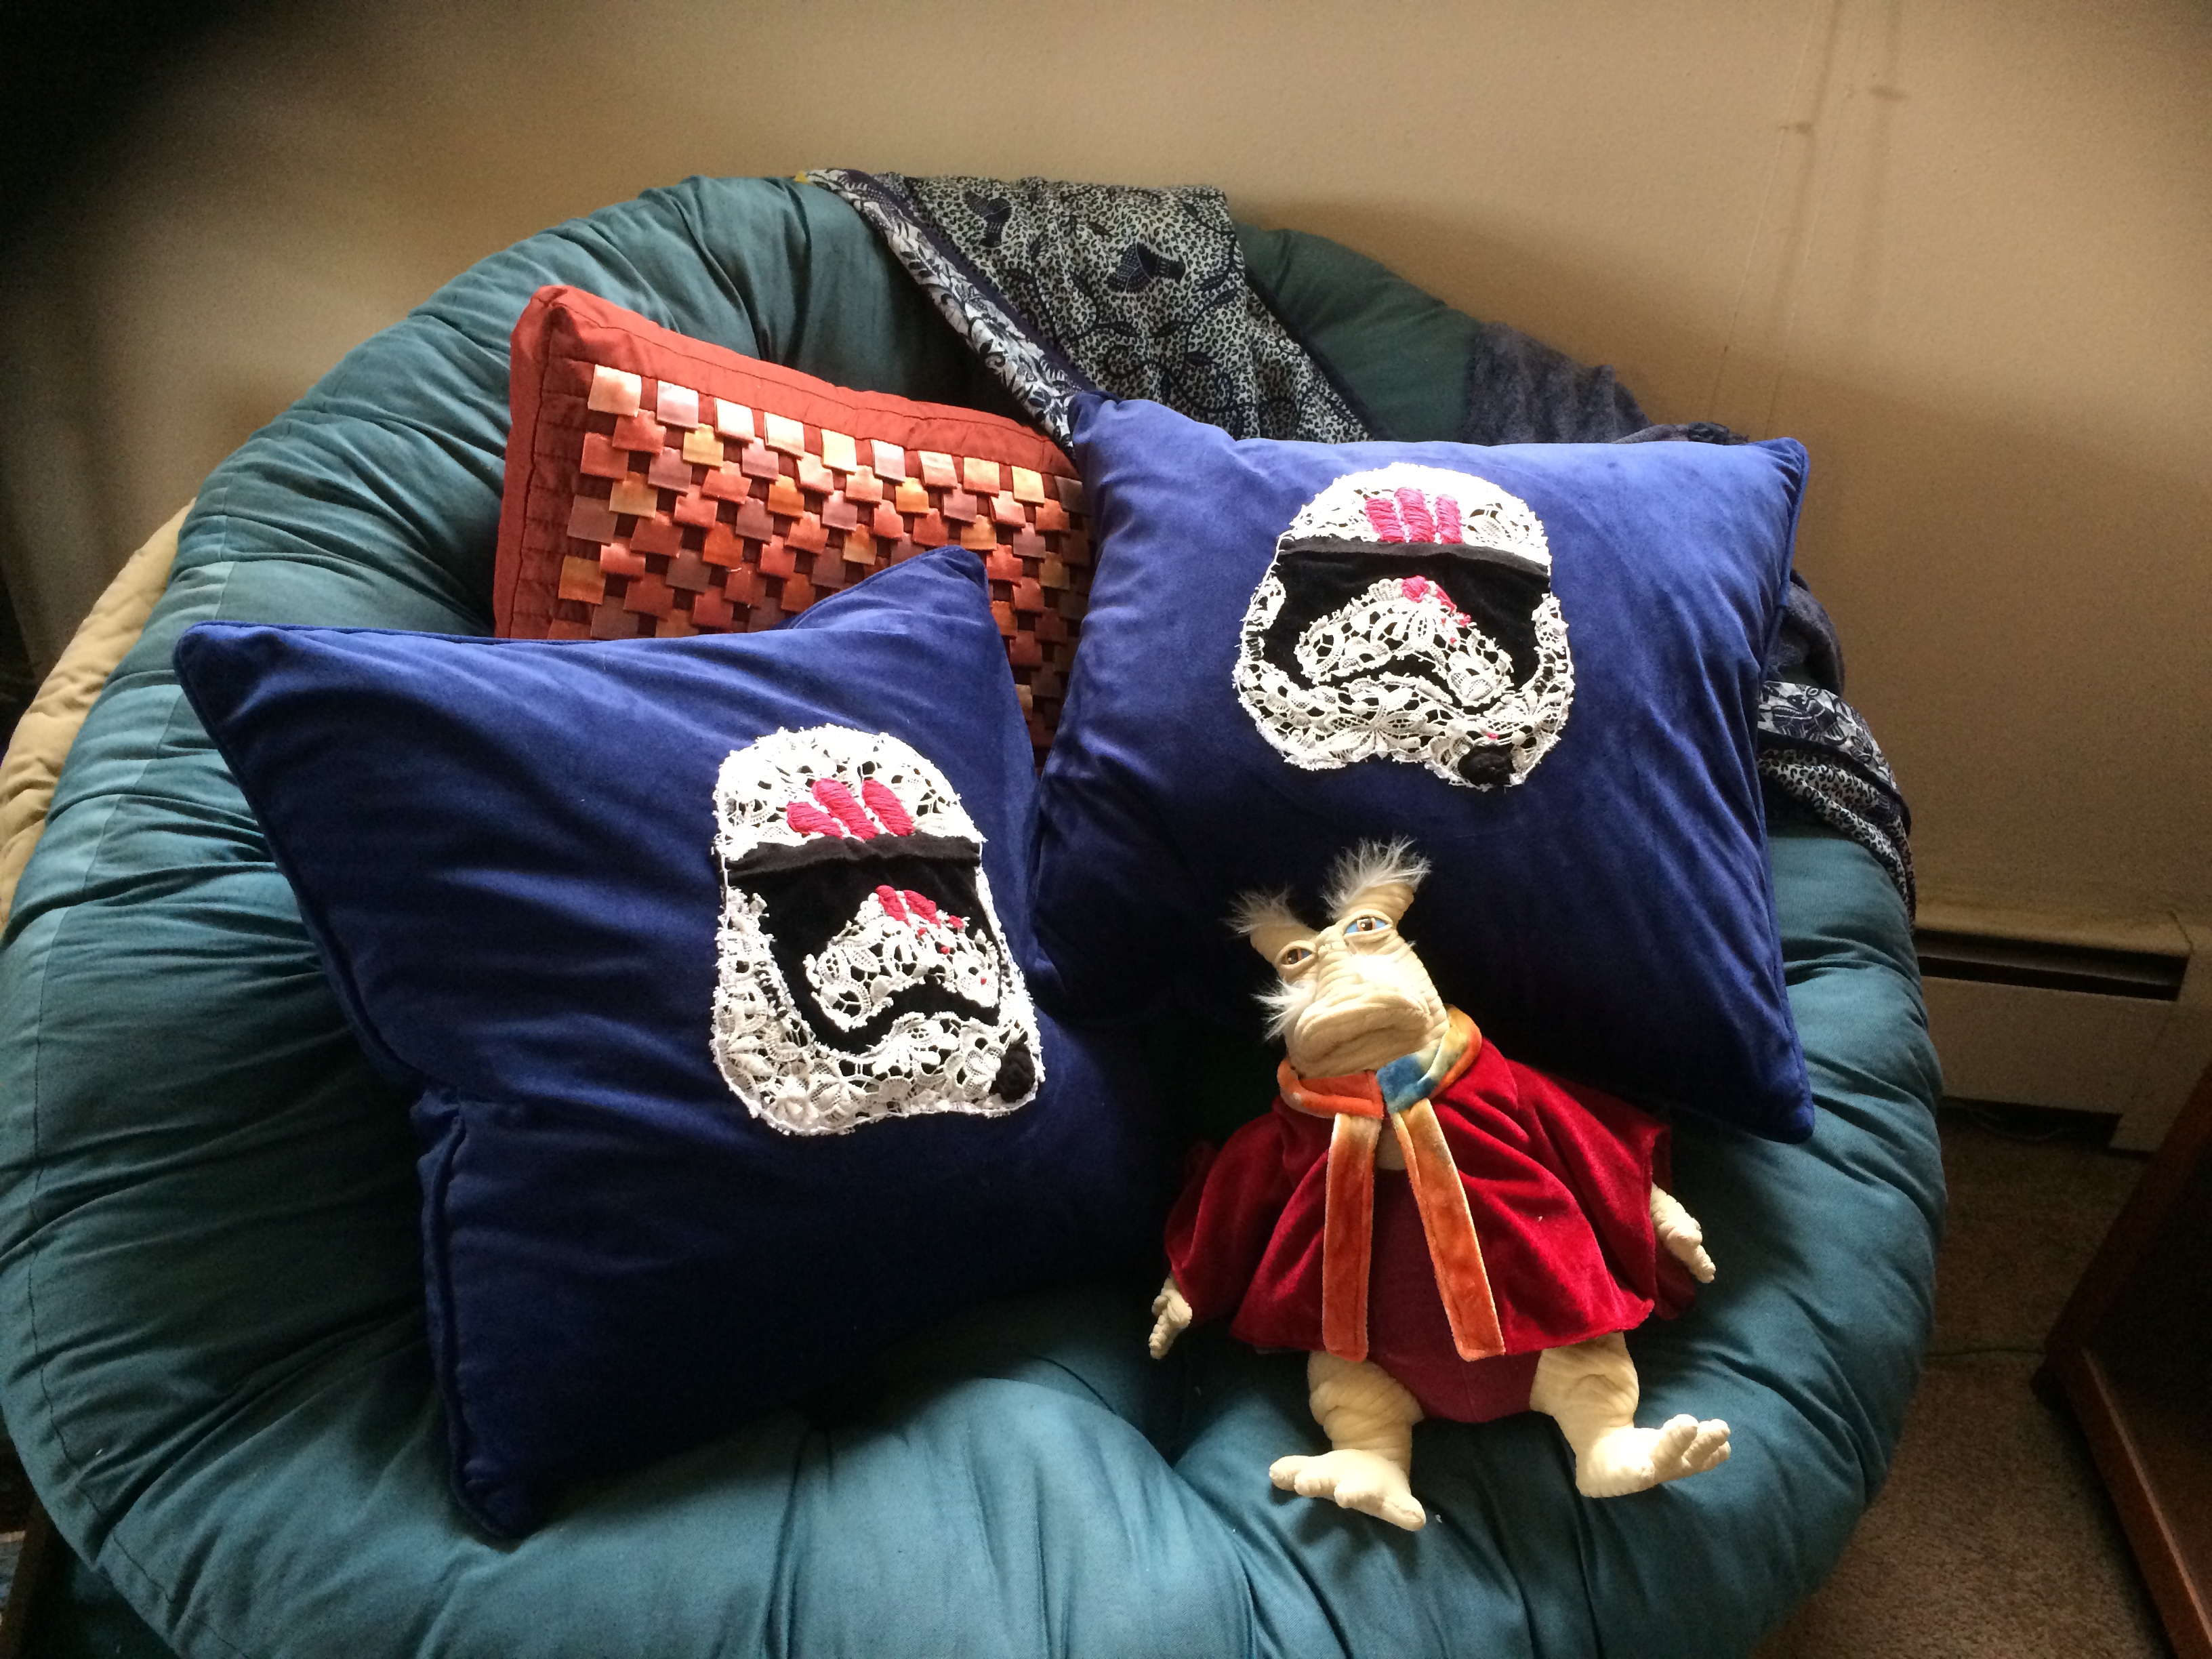
I’ve worn this shirt a couple of times and it always makes me happy. Once I’d recovered a bit from my first attempt, I made two more with even better results.
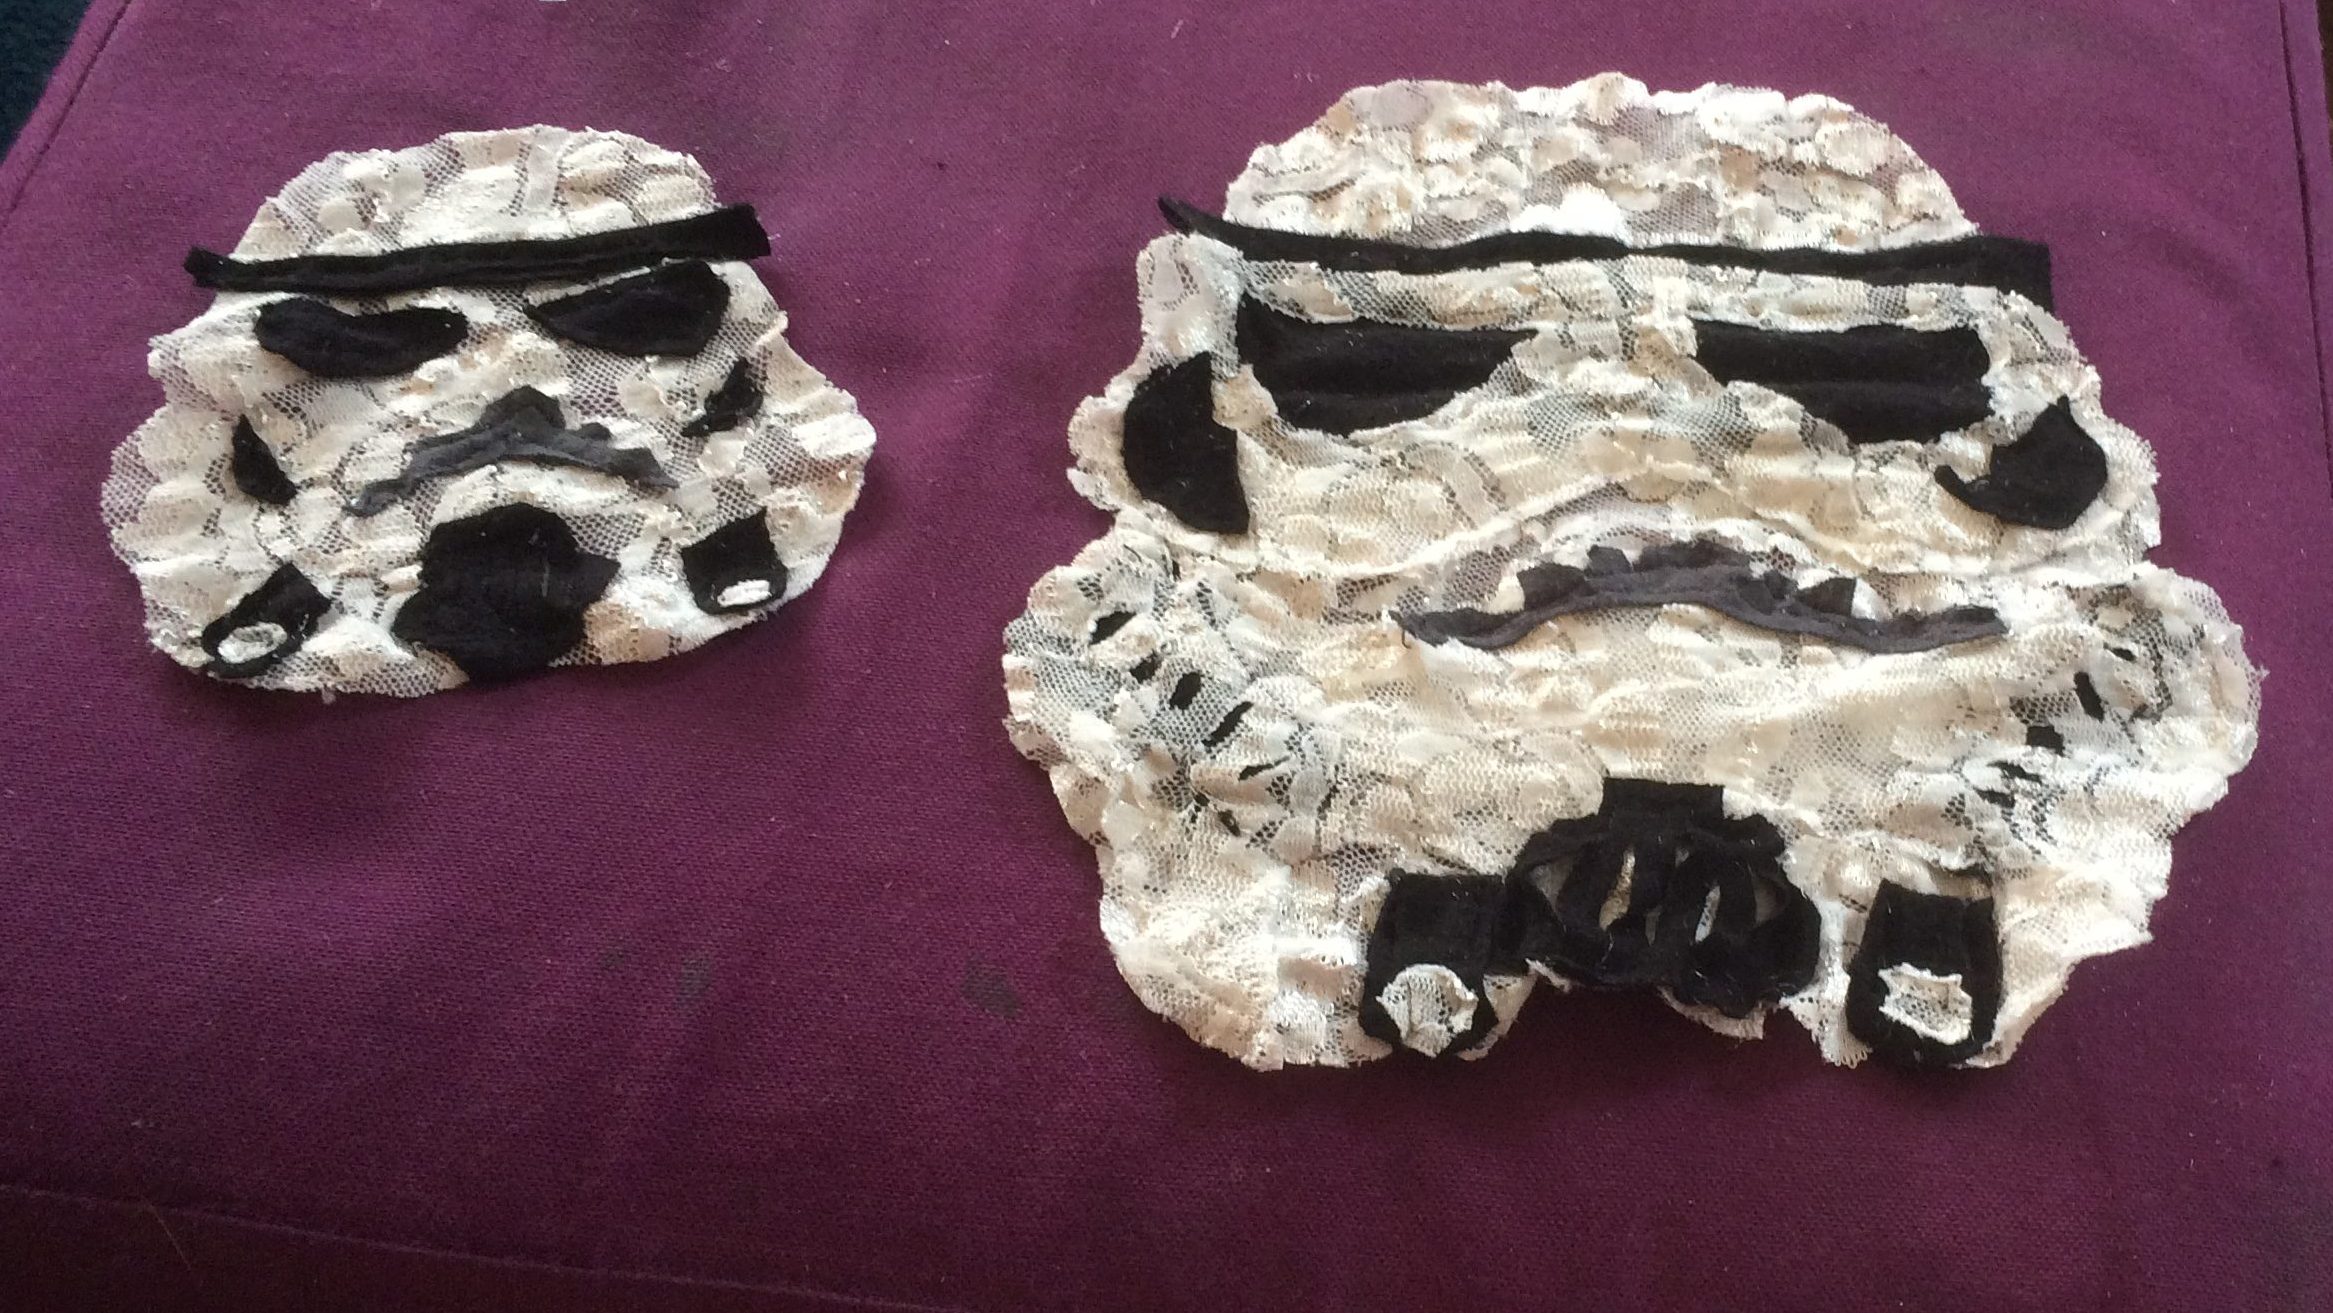
The larger one went onto another tee shirt for a good friend who once hand-knitted me a Yoda doll. The little one I sewed onto a hat for my niece.
If anyone does follow these somewhat vague and amateurish instructions, please share the results with me. I’d love to see more lace stormtroopers in the world.
Be on the lookout for a part 2. I’m not done with lace stormtroopers yet.